
 Pin it
Mustard Fried Chicken transforms the beloved Southern classic into something uniquely memorable by introducing a tangy mustard marinade that infuses each bite with incredible flavor. This unexpected ingredient doesn't just add a zesty punch—it actually tenderizes the meat, resulting in juicy chicken beneath a perfectly seasoned, golden crust. The contrast between the tangy interior and the crispy, well-seasoned exterior creates a flavor experience that stands apart from traditional fried chicken recipes. Once you try this version, you might find yourself permanently converted to the mustard side of fried chicken.
I was initially skeptical when my aunt first served this chicken at a family reunion—mustard in fried chicken seemed like a strange combination. But that first bite completely changed my mind. The tanginess wasn't overwhelming as I'd feared; instead, it created this perfect depth that made the chicken more interesting with each bite. When I finally got the recipe and made it myself, I discovered another benefit—the mustard actually helps tenderize the meat, resulting in some of the juiciest fried chicken I've ever made. My children, who normally pick the coating off regular fried chicken, devour every piece of this version, mustard marinade and all!
Essential Ingredients
- Chicken pieces: Bone-in, skin-on pieces provide the best flavor and juiciness. A mix of dark and white meat offers variety, with thighs and drumsticks remaining especially tender through the frying process.
- Yellow mustard: The star ingredient that creates the distinctive tangy profile. Use prepared yellow mustard rather than Dijon or whole grain for the classic flavor profile and proper consistency to coat the chicken.
- Seasoning salt: A balanced blend that adds multiple flavor notes in one ingredient. Look for a quality brand without MSG if that's a concern for your family.
- Garlic powder: Provides savory depth without the burn that fresh garlic might impart during marinating. The powder distributes more evenly throughout the marinade than minced garlic.
- Paprika: Adds subtle sweetness and beautiful color to both the marinade and coating. Use sweet paprika for classic flavor or smoked paprika for an additional dimension.
- Black pepper: Freshly ground provides the most vibrant flavor and pronounced speckles in the finished crust. Adjust quantity based on your heat preference.
- Dried parsley flakes: Beyond color, these add a subtle herbaceous note that complements the tanginess of the mustard. Make sure yours are still bright green for best flavor.
- All-purpose flour: Creates the foundation for the crispy coating. Measure by spooning into measuring cups and leveling for the proper ratio of flour to seasonings.
- Frying oil: Choose an oil with a high smoke point like vegetable, canola, or peanut oil. The cleaner the flavor of the oil, the more the chicken's seasoning will shine through.
 Pin it
Step-By-Step Preparation
- Step 1:
- Create the mustard marinade base - In a large bowl, combine 1 cup of yellow mustard with 1 tablespoon each of seasoning salt, garlic powder, black pepper, and dried parsley flakes, plus 1 teaspoon of paprika. Whisk thoroughly until all seasonings are evenly distributed throughout the mustard, creating a smooth, uniform marinade. This thorough mixing ensures each piece of chicken receives the same flavor profile.
- Step 2:
- Prepare the chicken pieces properly - Pat 6 pounds of chicken pieces dry with paper towels to remove excess moisture, which helps the marinade adhere better. If the pieces are particularly large, consider making a few shallow slashes in the meatiest parts to allow deeper penetration of the marinade. Ensure all pieces are roughly the same size to promote even cooking later.
- Step 3:
- Coat the chicken thoroughly - Add the chicken pieces to the mustard mixture, using your hands (wearing disposable gloves if preferred) to massage the marinade into every crevice, under skin flaps, and around bone joints. This hands-on approach ensures complete coverage far better than simply stirring with a spoon. Place the coated pieces in a single layer in a shallow baking dish or on a rimmed baking sheet.
- Step 4:
- Marinate with patience - Cover the chicken with plastic wrap and refrigerate for at least 2 hours, but preferably overnight or up to 24 hours. The longer marinating time not only improves flavor penetration but also allows the natural acids in the mustard to tenderize the meat more effectively. Turn the pieces occasionally if marinating for an extended period to ensure even flavor distribution.
- Step 5:
- Prepare the seasoned flour coating - When ready to cook, whisk together 3 cups of all-purpose flour, 2 teaspoons each of seasoning salt, black pepper, garlic powder, and paprika in a large, shallow dish. The shallow dish allows for easier dredging than a deep bowl. For extra crispiness, add 1 tablespoon of cornstarch to the mixture, which helps create an even crispier exterior.
- Step 6:
- Dredge with attention to detail - Remove chicken pieces from the marinade, allowing excess to drip off for a few seconds. Working with one piece at a time, place it in the seasoned flour mixture and press the coating firmly onto all surfaces. Flip and repeat, ensuring every bit of the mustard-coated chicken is now covered with flour. Shake off excess flour and place on a wire rack set over a baking sheet. This resting period (15-20 minutes) allows the coating to adhere better during frying.
- Step 7:
- Heat oil to precise temperature - In a large, heavy-bottomed skillet or Dutch oven, heat 2-3 inches of oil to exactly 325°F (165°C), verifying with a candy/deep-fry thermometer. This slightly lower temperature than typical fried chicken recipes (which often call for 350°F) prevents the seasoned coating from burning before the chicken cooks through completely.
- Step 8:
- Fry with care and attention - Carefully place several pieces of chicken into the hot oil, skin-side down first, without crowding the pan. Maintain the oil temperature between 315-325°F throughout cooking by adjusting the heat as needed. Fry dark meat pieces for approximately 14-16 minutes and white meat for 12-14 minutes, turning occasionally with tongs for even browning. The internal temperature should reach 165°F (74°C) for white meat and 175°F (80°C) for dark meat.
- Step 9:
- Drain and rest properly - Transfer the fried chicken to a clean wire rack set over a paper towel-lined baking sheet—never directly onto paper towels, which can create steam and soften the crispy coating. Allow the chicken to rest for at least 10 minutes before serving. This resting period allows the juices to redistribute throughout the meat while excess oil drains away, resulting in juicier chicken with a crispier exterior.
The Art of Temperature Control
Achieving perfectly fried chicken relies heavily on maintaining the right oil temperature throughout the cooking process. Too hot, and your coating burns while the interior remains raw; too cool, and the chicken absorbs excess oil, resulting in a greasy, soggy product.
The ideal temperature range for mustard fried chicken is slightly lower than traditional recipes—325°F (165°C) rather than 350°F (175°C). This adjustment accounts for the natural sugars in the mustard, which caramelize and can burn more quickly than plain flour coatings.
When you add chicken to the oil, the temperature naturally drops. Resist the urge to crank up the heat immediately. Instead, allow the oil to recover gradually while maintaining a steady 315-325°F range. A digital thermometer with a clip is invaluable for monitoring this continuously.
Frying in batches is essential, even if it seems time-consuming. Overcrowding the pan causes significant temperature drops and uneven cooking. Allow enough space for each piece to be surrounded by bubbling oil without touching its neighbors.
For even browning, use tongs to gently turn each piece every 3-4 minutes, being careful not to tear the developing crust. This rotation ensures all sides receive equal heat exposure and develop that coveted golden-brown finish.
I've learned through many batches of this chicken that the quality of the mustard truly matters. Once I experimented with a fancy stone-ground mustard thinking it would elevate the recipe, but the texture was all wrong—the marinade didn't adhere properly and the seeds burned during frying. Another time, trying to cut corners, I shortened the marinating time to just 30 minutes, and the difference was remarkable. The quick-marinated chicken had a mere surface coating of flavor, while the overnight version had that signature tanginess all the way to the bone. My family immediately noticed the difference, with my youngest declaring, "This isn't the good chicken." Now I plan ahead without exception, knowing that the waiting time is essential to the recipe's success.
 Pin it
Serving Suggestions
Mustard fried chicken pairs wonderfully with both traditional and unexpected sides. For a classic Southern meal, serve alongside creamy mashed potatoes, which provide a mild canvas that contrasts beautifully with the tangy, crispy chicken. A side of collard greens cooked with a smoked ham hock offers earthy depth that complements the chicken's brightness.
For a more modern approach, consider a crisp apple and fennel slaw dressed lightly with cider vinegar and olive oil. The fresh crunch and subtle anise notes create a refreshing counterpoint to the rich fried chicken. A simple arugula salad with lemon vinaigrette also works beautifully, its peppery character enhancing the mustard notes in the chicken.
Bread-wise, buttermilk biscuits are traditional, but consider cornbread as well—particularly a slightly sweet version that plays against the chicken's tanginess. For an interesting twist, try serving the chicken with sweet potato waffles for a sophisticated take on chicken and waffles, where the sweetness of the waffles beautifully offsets the zesty chicken.
For beverages, the chicken pairs exceptionally well with crisp, dry hard cider, unsweet tea with lemon, or for wine lovers, a not-too-oaky Chardonnay that can stand up to the bold flavors without overwhelming them.
My final thought on mustard fried chicken is that it represents everything wonderful about home cooking—taking a familiar favorite and transforming it with an unexpected twist that becomes a new family tradition. There's something deeply satisfying about watching someone take their first skeptical bite, only to see their eyes widen with delight as they discover this isn't just regular fried chicken. The mustard doesn't announce itself loudly; instead, it creates a depth of flavor that leaves people wondering what your secret might be. This recipe has brought so much joy to my table over the years, with friends and family requesting it for special gatherings and casual Sunday dinners alike. It's the kind of dish that creates memories—the one people will ask you to make again and again.
Frequently Asked Questions
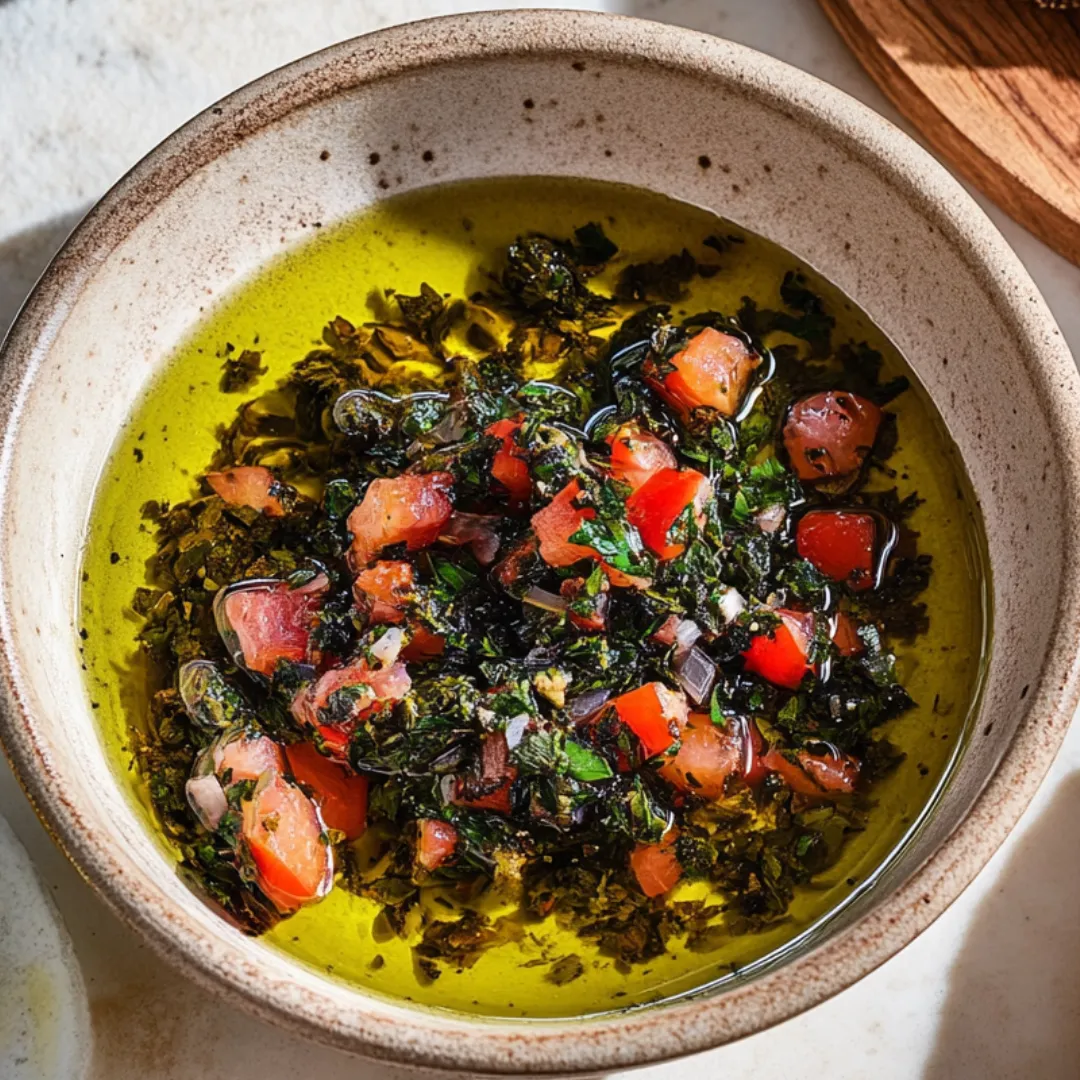
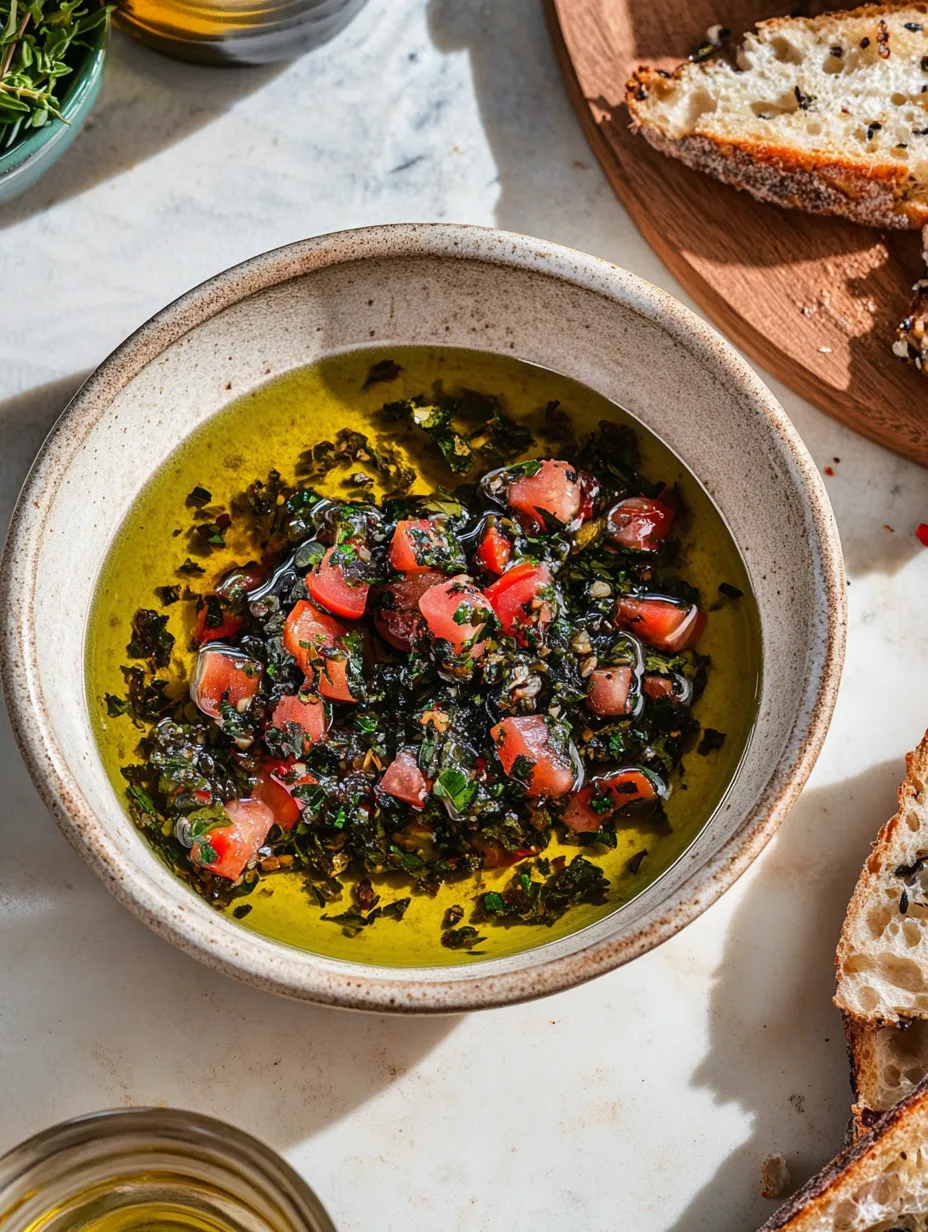
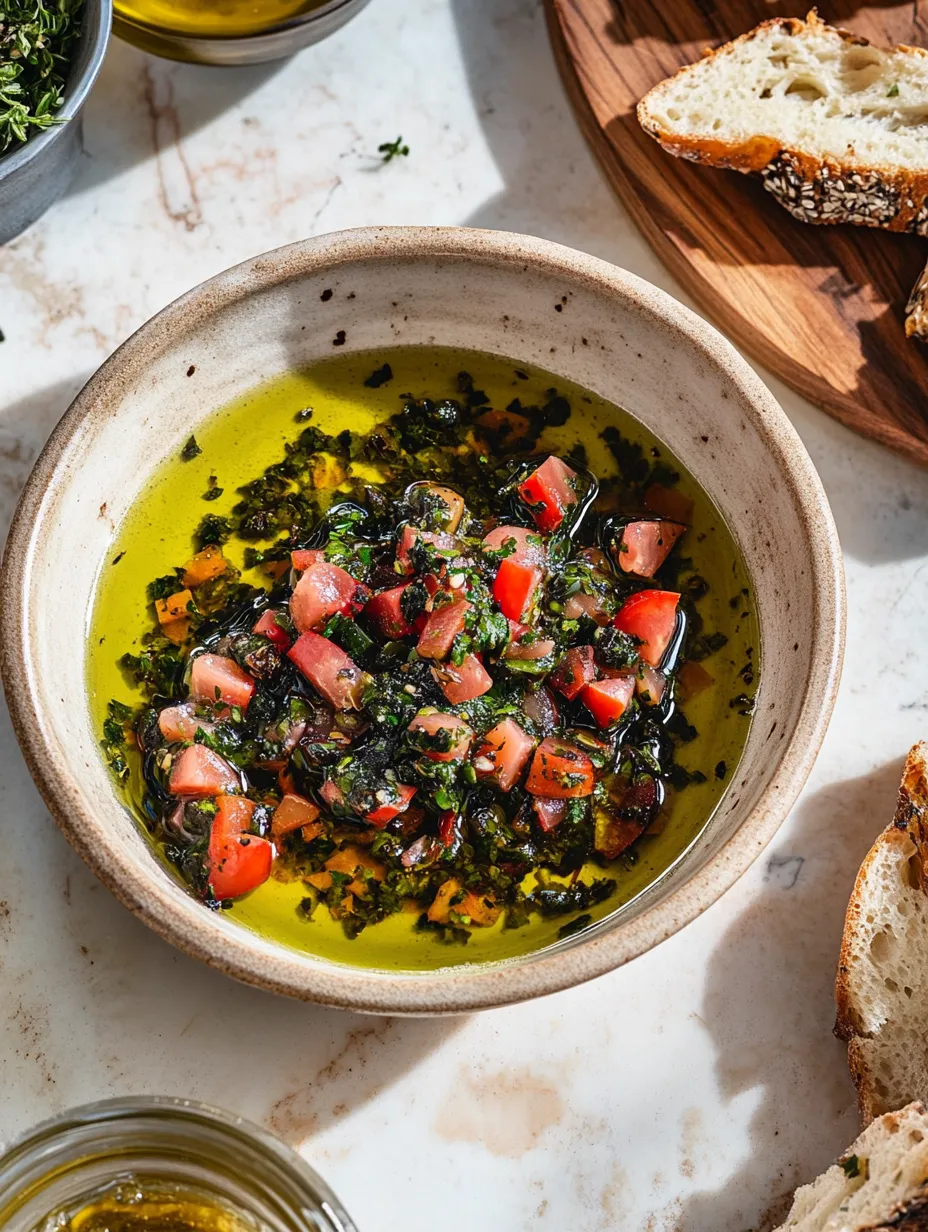
- → How long does this olive oil dip last?
- The dip will keep well in the refrigerator for up to a week. Just let it come to room temperature before serving as the oil may solidify when cold.
- → Can I use fresh herbs instead of dried?
- Absolutely! Fresh herbs will give an even more vibrant flavor. Use about three times the amount of fresh herbs as you would dried.
- → What kind of olive oil is best for this dip?
- Use a good quality extra virgin olive oil since it's the main ingredient. The better the oil, the better your dip will taste.
- → Can I make this dip without garlic?
- Yes, you can omit the garlic or substitute with a small amount of garlic powder if you prefer a milder flavor.
- → What's the best bread to serve with this dip?
- Crusty artisan breads like ciabatta, baguette, or sourdough work wonderfully. Warm bread enhances the experience even more!