
 Pin it
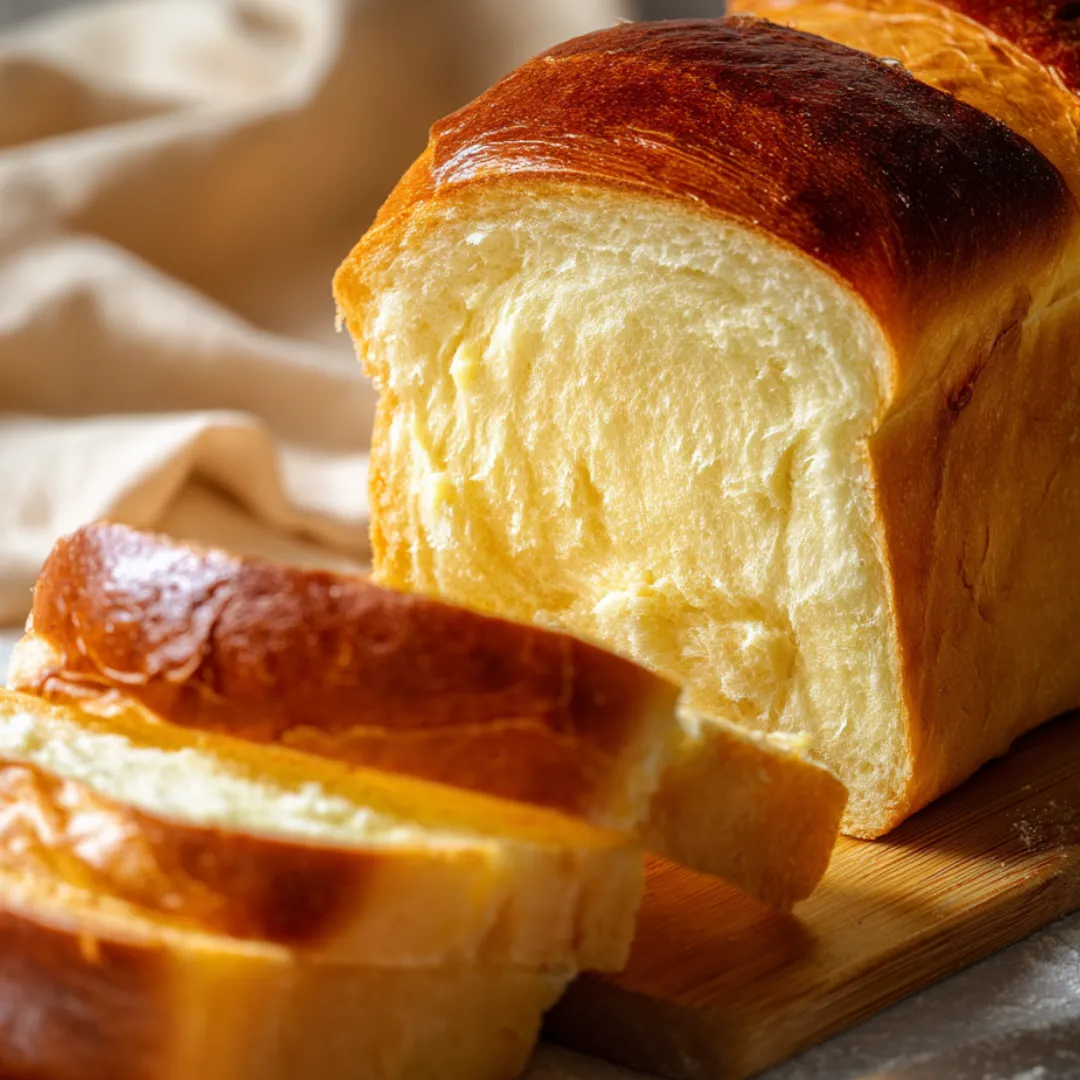
This incredibly soft, tender Milk Bread Loaf transforms ordinary sandwiches and toast into something truly special. With its pillowy texture, subtle sweetness, and beautiful golden crust, this Japanese-inspired bread has become a staple in my kitchen. The secret lies in the tangzhong method – a cooked flour paste that creates that signature cloud-like texture that stays fresh for days longer than traditional homemade bread.
I first attempted this recipe after returning from a trip to Japan where I became obsessed with their incredible bakeries. After several failed attempts with regular bread recipes, I discovered the tangzhong method that Japanese and Chinese bakers use. The first time I pulled a successful loaf from my oven, my kitchen filled with that intoxicating fresh bread aroma, and my family devoured half the loaf before it even cooled completely!
Ingredients
- 3 tablespoons (45g) bread flour (for tangzhong): The high protein content in bread flour creates the perfect starter paste texture. Look for unbleached bread flour with at least 12% protein content for best results. The flour should feel slightly grainy between your fingers, not powdery like cake flour.
- ½ cup (120ml) whole milk (for tangzhong): Provides richness and helps create the smooth, gelatinized paste. The fat content matters here – whole milk produces a more tender result than reduced-fat alternatives. The milk should be fresh and have a clean, sweet smell.
- ¼ cup (60ml) water (for tangzhong): Helps create the proper consistency for the starter paste. Filtered water works best as chlorine in tap water can sometimes affect yeast development.
- 2 ½ cups (320g) bread flour (for dough): Creates the structure and chew of the bread. Weighing your flour rather than using volume measurements ensures consistent results. The flour should feel slightly elastic when you squeeze a handful.
- 2 tablespoons (30g) sugar: Adds a gentle sweetness and helps feed the yeast. Look for fine granulated sugar that dissolves easily, not coarse sugar that might create uneven sweetness.
- 1 teaspoon salt: Enhances flavor and regulates yeast activity. Fine sea salt distributes most evenly throughout the dough. Good salt should be white and not have an overly bitter aftertaste.
- 2 ¼ teaspoons (1 packet) instant yeast: Provides reliable rise without needing to be activated first. Check the expiration date – fresh yeast should smell earthy and slightly sweet, not sour.
- ½ cup (120ml) warm milk (about 110°F/43°C) (for dough): Activates yeast and hydrates the dough. The temperature is critical – too hot will kill the yeast, too cool will slow activation. It should feel pleasantly warm, like bath water, when you drop some on your wrist.
- 1 large egg, room temperature: Adds richness, color, and helps bind the dough. Room temperature eggs incorporate more easily than cold ones. The yolk should be bright yellow-orange and the white shouldn't be watery.
- 3 tablespoons (45g) unsalted butter, softened: Creates tenderness and adds flavor. The butter should be soft enough to easily indent with your finger, but not melting or oily. European-style butter with higher fat content produces an even richer result.
 Pin it
Step-by-Step Instructions
- Step 1:
- Create the tangzhong base - Begin by measuring exactly 3 tablespoons of bread flour into a small saucepan - precision matters here. Add the half cup of whole milk and quarter cup of water, whisking immediately to prevent any lumps from forming. Place the saucepan over medium heat and whisk continuously as the mixture heats. Within 2-3 minutes, you'll notice the mixture starting to thicken - keep whisking to prevent any scorching on the bottom of the pan. Continue cooking until the whisk leaves visible trails in the mixture and it resembles a thick, smooth paste similar to condensed cream soup. Remove from heat immediately once thickened to avoid overcooking. Transfer to a small bowl and press plastic wrap directly onto the surface to prevent a skin from forming. Allow it to cool completely to room temperature, which usually takes about 20-30 minutes. This cooling period is crucial as adding hot tangzhong to your yeast mixture would kill the yeast and prevent proper rising.
- Step 2:
- Combine the dry ingredients properly - In a large mixing bowl, measure out your bread flour using a kitchen scale for accuracy. Add the sugar, salt, and instant yeast, keeping the salt and yeast on opposite sides of the bowl initially as direct contact between salt and yeast can inhibit yeast activity. Using a whisk, thoroughly combine these dry ingredients with at least 20 gentle strokes to ensure even distribution of the yeast and salt throughout the flour. This even distribution creates consistent fermentation and rising throughout your loaf.
- Step 3:
- Form the initial dough - Create a well in the center of your dry ingredients, similar to making pasta. Pour in your warm milk, ensuring it's around 110°F - it should feel comfortably warm on your wrist but not hot. Add the room temperature egg and the cooled tangzhong paste. Using a wooden spoon or sturdy spatula, stir the mixture in a circular motion, gradually incorporating the dry ingredients from the sides of the well until a shaggy, sticky dough begins to form. Make sure no dry pockets of flour remain at the bottom of the bowl. The dough will look rather rough and uneven at this stage - that's exactly how it should appear.
- Step 4:
- Develop the gluten structure - Transfer the shaggy dough to a lightly floured surface for hand kneading, or use the dough hook attachment on your stand mixer set to medium-low speed. If kneading by hand, use the heel of your palm to push the dough away from you, then fold it back over itself, rotate a quarter turn, and repeat. Continue this rhythmic motion for about 5 minutes until the dough becomes smoother but still feels slightly tacky. For machine kneading, 4-5 minutes on medium-low speed achieves the same result. At this point, the dough should pass the "windowpane test" - you can stretch a small piece thin enough to see light through it without tearing.
- Step 5:
- Incorporate the butter properly - Add the softened butter in small pieces, about a tablespoon at a time. If kneading by hand, flatten the dough slightly, place some butter in the center, fold the dough over it, and continue kneading. For machine kneading, add butter pieces gradually with the mixer running. The dough will initially become slippery and may appear to separate - this is normal. Continue kneading for 8-10 minutes until the butter is fully incorporated and the dough becomes shiny, elastic, and smooth. The transformation is remarkable - from a shaggy mass to a soft, stretchy dough that pulls away cleanly from the sides of the bowl or kneading surface. The dough should feel like well-kneaded pizza dough but softer, with a slight tackiness when touched.
- Step 6:
- First rise with proper environment - Gather the dough into a smooth ball by pulling the edges toward the center and pinching them together, then place it seam-side down in a lightly greased bowl at least twice its size to allow room for expansion. Cover with a damp kitchen towel or plastic wrap to create a humid environment that prevents the surface from drying out. Place the bowl in a draft-free spot with a temperature between 75-80°F - inside a turned-off oven with the light on creates an ideal environment. Allow the dough to rise until doubled in volume, which takes about 1 to 1.5 hours depending on your kitchen temperature. You can test if it's ready by gently pressing a finger about half an inch into the dough - if the indentation remains, the dough has risen sufficiently.
- Step 7:
- Shape the loaf with precision - Once doubled, gently press your fist into the center of the dough to deflate it, then turn it out onto a lightly floured surface. Using a bench scraper or knife, divide the dough into three equal portions, weighing them if you have a scale for perfect uniformity. Shape each portion into a ball by pulling the edges toward the center and pinching to seal, then let them rest covered for 10 minutes to relax the gluten. Next, use a rolling pin to flatten each ball into an oval shape about 6 inches long and 4 inches wide. Fold the top third of the oval down and the bottom third up, like folding a letter. Roll each folded piece tightly from one short end to the other, creating a small log with the seam on the bottom. Arrange these three logs side by side in a greased 9x5 inch loaf pan, with the seams facing the sides of the pan for the most attractive final appearance.
- Step 8:
- Perfect second rise - Cover the loaf pan loosely with plastic wrap or a clean kitchen towel. This second rise is crucial for developing the bread's final texture and should take place in the same warm, draft-free environment as the first rise. Allow the dough to rise until it reaches about 1 inch above the rim of the pan, which typically takes 40-50 minutes. The dough should look noticeably puffy and expanded, filling the pan completely. This rise should not be rushed or extended too long - under-proofing results in dense bread, while over-proofing may cause collapse during baking.
- Step 9:
- Prepare for beautiful baking - About 20 minutes before the second rise completes, preheat your oven to exactly 350°F (175°C), positioning the rack in the center. If using a conventional oven rather than convection, you may want to rotate the pan halfway through baking for even browning. For a glossy, golden crust, prepare the egg wash by whisking together one egg yolk with a tablespoon of milk until completely smooth. Using a pastry brush, gently apply a thin, even layer of egg wash over the entire surface of the risen dough, being careful not to press too hard and deflate it. The egg wash creates that bakery-quality shine and rich color.
- Step 10:
- Bake with precision - Place the loaf on the center rack of your fully preheated oven. Bake for 25-30 minutes, monitoring carefully after the 20-minute mark. The bread should turn a rich golden brown, and the internal temperature should reach 190°F (88°C) when measured with an instant-read thermometer inserted into the center. Another test for doneness is tapping the bottom of the loaf - it should sound hollow when fully baked. If the top is browning too quickly but the bread isn't done, loosely tent it with aluminum foil for the remaining baking time.
- Step 11:
- Cool properly for perfect texture - Remove the pan from the oven and let it rest for just 5 minutes - this brief rest makes removal easier. Carefully invert the loaf onto a wire cooling rack, then immediately turn it right side up. The cooling process is crucial for texture development - cutting into hot bread releases steam and can make the texture gummy. Allow the loaf to cool for at least 1 hour before slicing, though I know the temptation to cut in immediately is strong! As it cools, listen closely and you might hear the bread "singing" - gentle crackling sounds as the crust contracts.
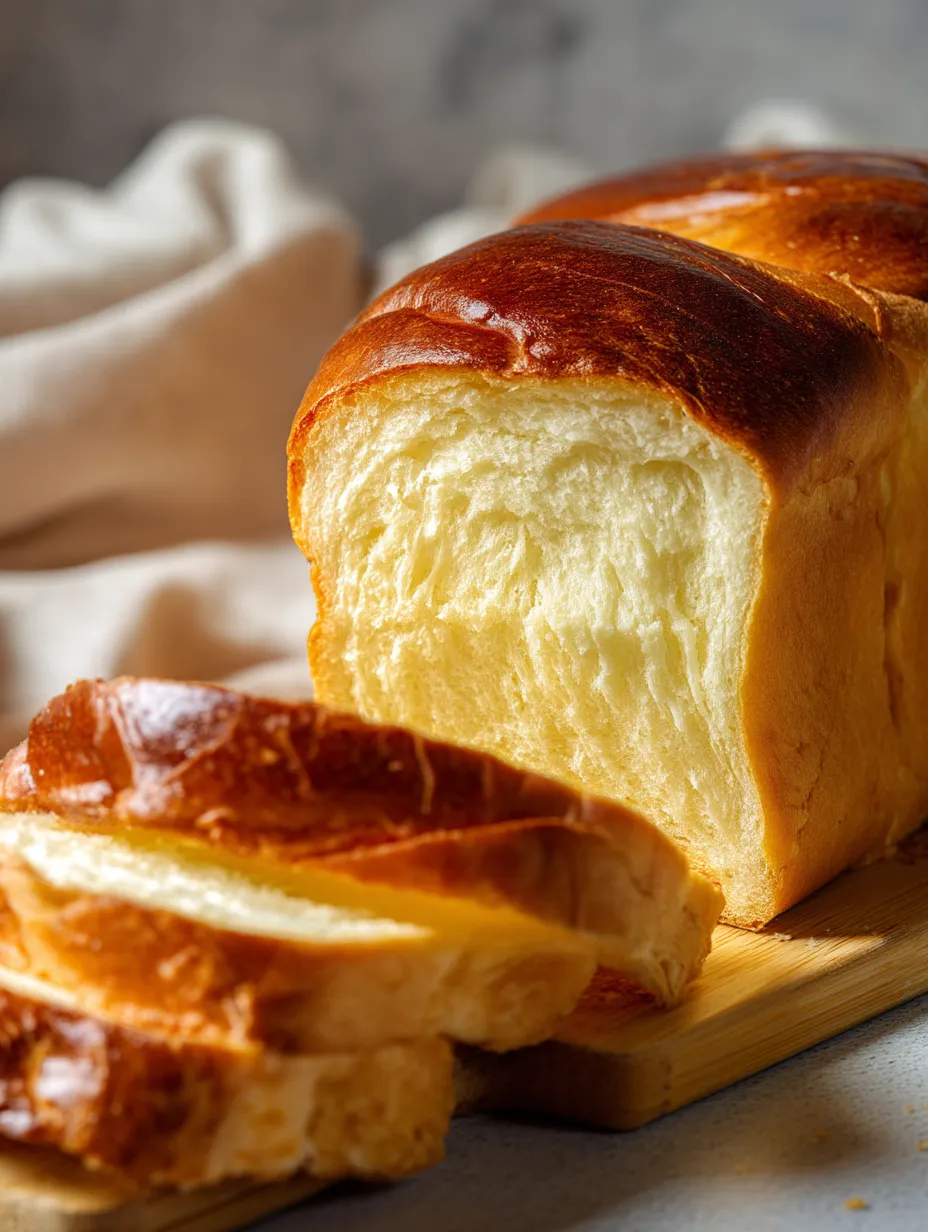
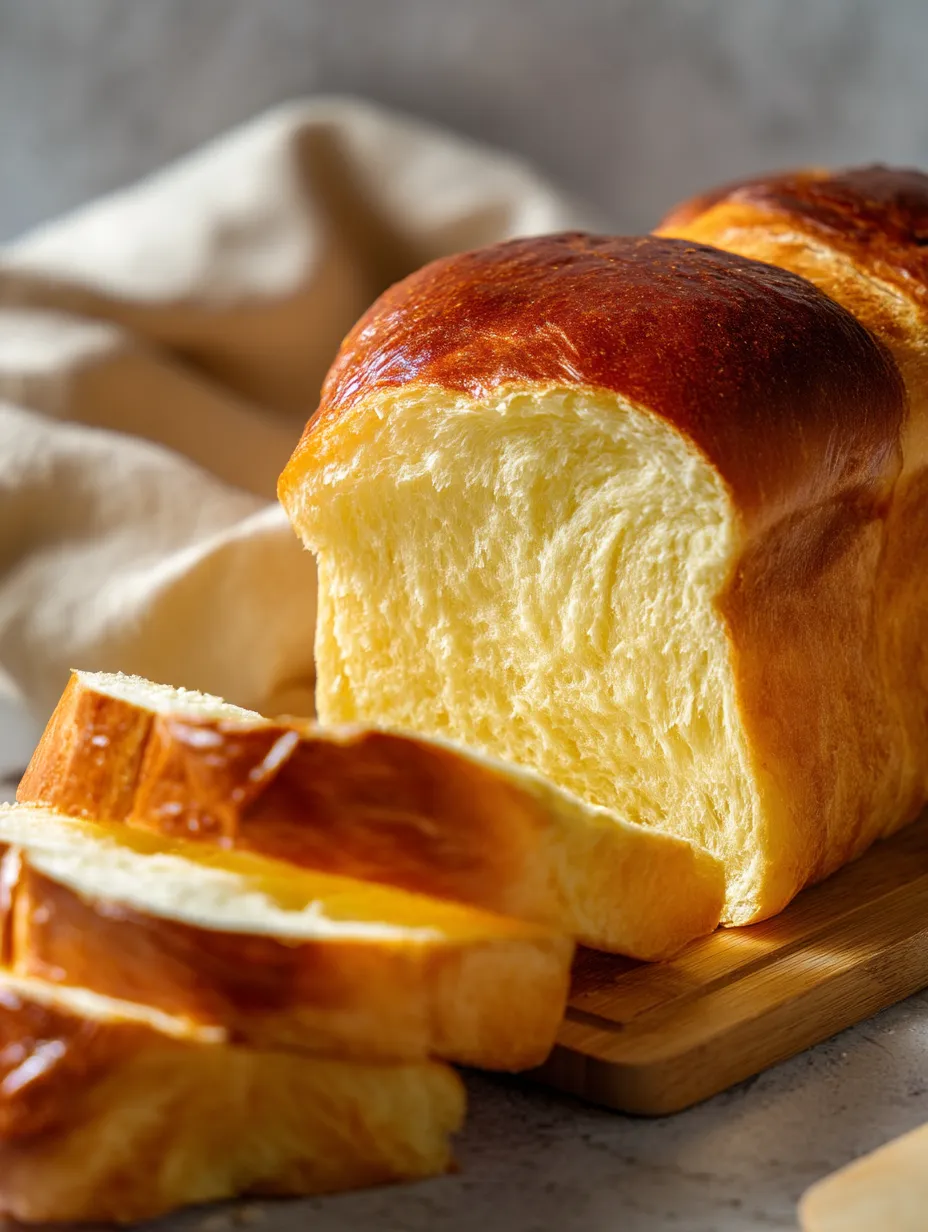
The finished loaf should have a soft, golden crust and when sliced, reveal a perfectly even, feathery interior with a beautiful swirled pattern from the rolling method!
The Magic of Tangzhong
What continues to amaze me about this Milk Bread recipe is how the simple addition of a cooked flour paste transforms ordinary bread into something extraordinary. The tangzhong method originated in Asian baking traditions and works by pre-gelatinizing some of the starches in the flour, allowing them to absorb and hold significantly more moisture throughout the baking process.
I first learned about tangzhong from my elderly neighbor who had worked as a professional baker in Osaka. She explained that this technique was the key to those impossibly soft breads I had fallen in love with during my travels. The first time I tried it, I was skeptical about the extra step, but the difference in the final bread texture was immediately noticeable – ethereally light with a tender, pull-apart quality that stayed fresh for nearly a week.
What makes this technique particularly special is how forgiving it makes the bread. Traditional homemade loaves often become stale within a day, but the increased moisture retention from the tangzhong method means this bread maintains its softness for days. I've even used slightly older loaves for French toast with spectacular results – the bread absorbs the custard perfectly without falling apart.
Versatile Serving Suggestions
While this milk bread makes incredible sandwiches, its uses extend far beyond the basic lunch option. The slightly sweet, tender crumb pairs beautifully with both savory and sweet applications, making it one of the most versatile breads in my repertoire.
For breakfast, thick-cut slices make the ultimate toast – the already tender texture develops a delicate crispness on the outside while remaining cloud-like within. I love mine topped with a spread of salted butter and homemade jam, though my husband prefers his with avocado and a perfectly poached egg.
When we host brunch gatherings, I often prepare this bread a day ahead and transform it into an unforgettable French toast casserole. The bread's structure allows it to soak up the custard mixture without disintegrating, creating perfect custardy slices that caramelize beautifully when baked.
For dinner parties, I sometimes shape the same dough into dinner rolls instead of a loaf. The individual rolls pull apart with that signature feathery texture that makes them irresistible alongside soups and stews. My guests always comment on the professional quality, never guessing how simple the technique actually is.
I discovered the importance of proper cooling by accident when I was rushing to serve this bread at a family gathering. I cut into the loaf too soon, and despite the amazing aroma, the texture became slightly gummy. Now I insist on the full cooling period, even setting a timer to prevent my impatience from ruining a perfect loaf. My grandmother, who grew up making bread from scratch, always says you can hear when bread is properly cooled – the crackling sounds should completely stop before cutting.
 Pin it
Common Troubleshooting Tips
Over the years of making this bread, I've encountered and solved nearly every possible issue. One of the most common problems for beginners is uneven rising, which typically happens when the dough isn't kneaded long enough. The kneading process develops the gluten structure that traps air bubbles, creating that perfect rise and texture. I recommend setting a timer during kneading rather than guessing – the full 8-10 minutes after adding butter really does make a difference.
Another challenge I've faced is seasonal adjustments. During humid summer months, the dough often requires slightly less liquid, while winter baking might need a tablespoon or two more. Rather than sticking rigidly to measurements, I've learned to feel the dough – it should be soft and slightly tacky but not sticky enough to coat your fingers.
For those struggling with browning, the egg wash is truly non-negotiable. I once skipped it when I was out of eggs, and while the bread tasted wonderful, it lacked that beautiful golden color that makes everyone want to grab a slice. If you absolutely can't use eggs, a milk wash will provide some color, though not quite the same glossy finish.
I've been making this milk bread for my family for nearly five years now, and it still brings me joy every time I pull a perfect loaf from the oven. What started as an attempt to recreate a vacation memory has become our weekend tradition. My children know that Sunday mornings mean fresh milk bread with breakfast, and they've recently started helping with the kneading and shaping. There's something deeply satisfying about passing down this technique, watching their small hands learn the feel of perfectly developed dough, and seeing their pride when the loaf emerges golden and beautiful from the oven. This isn't just a recipe – it's become part of our family story.
Frequently Asked Questions
- → What is tangzhong and why is it important?
- Tangzhong is a cooked mixture of flour and liquid that helps the bread retain moisture. This technique creates an exceptionally soft texture and extends the bread's freshness by days.
- → Can I use all-purpose flour instead of bread flour?
- Yes, but the texture won't be quite as fluffy. Bread flour has more protein which creates stronger gluten networks for a better rise and chewier texture.
- → How should I store this bread?
- Once completely cooled, store in an airtight container or plastic bag at room temperature for up to 5 days. For longer storage, slice and freeze for up to 3 months.
- → Can I make this without a stand mixer?
- Absolutely! You can knead by hand on a lightly floured surface for about 12-15 minutes, though the dough is quite sticky at first when adding the butter.
- → What if my dough isn't rising properly?
- Check that your yeast is fresh and that your rising environment is warm enough (around 75-80°F is ideal). You can create a warm spot by placing the covered dough near a preheating oven.