
 Pin it
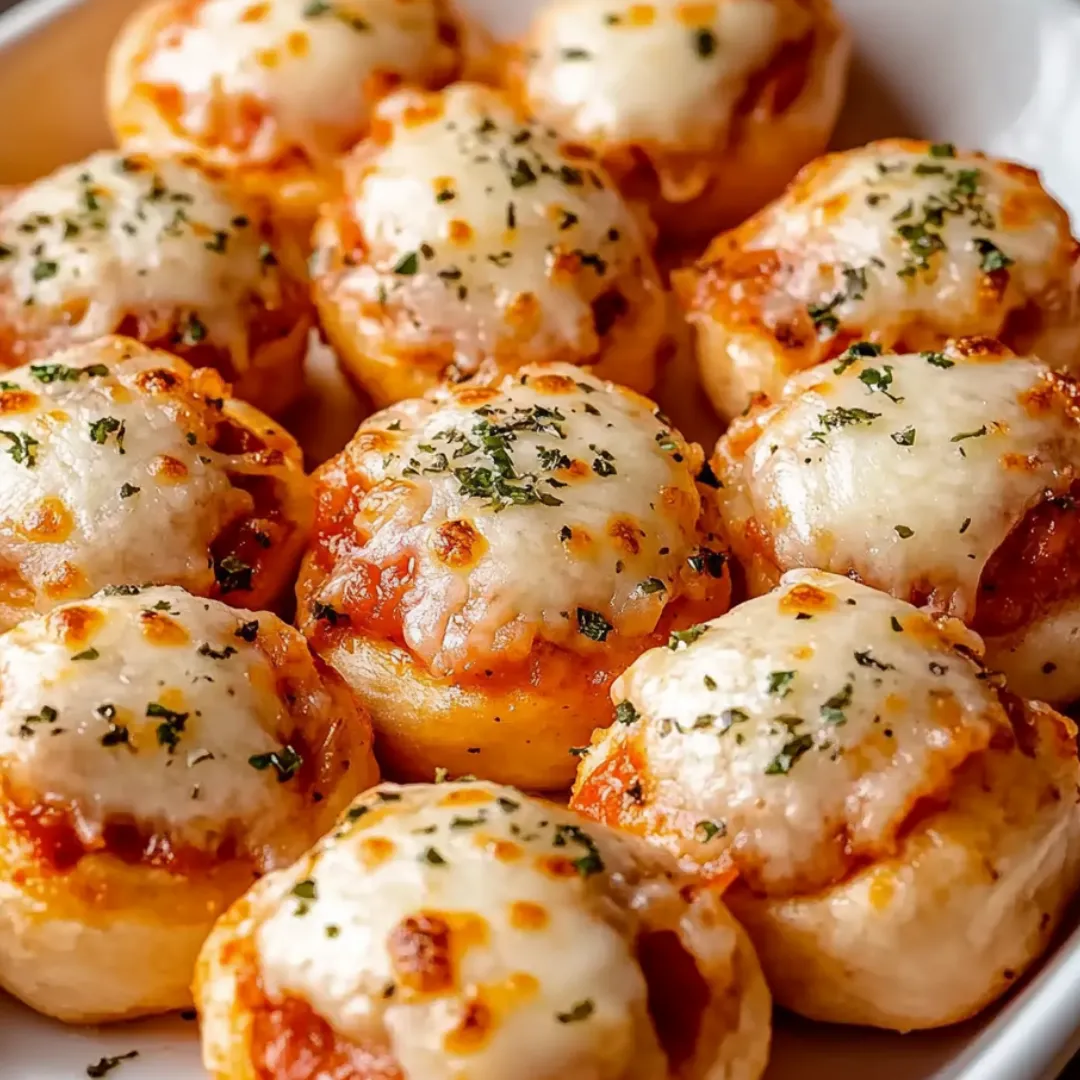
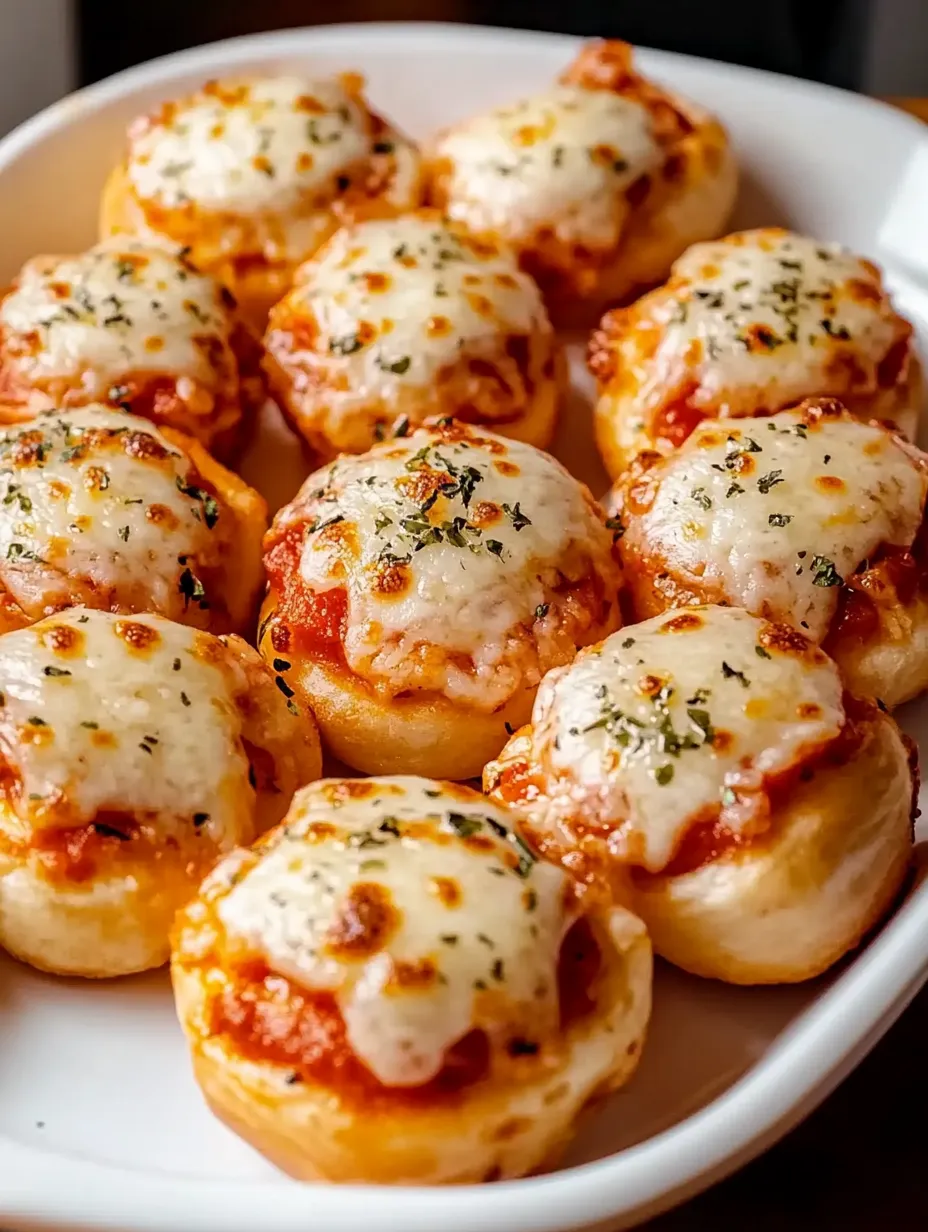
These irresistible Pizza Poppers transform all the flavors you love about pizza into perfectly portable, pop-in-your-mouth bites that deliver big taste in a small package. Each golden-brown morsel features a crispy exterior that gives way to a gooey center filled with melty cheese, zesty sauce, and savory toppings. The beauty of these versatile little bundles is how they concentrate the classic pizza experience into a convenient, hand-held form that eliminates the mess while maximizing flavor. Whether served as party appetizers, after-school snacks, or a fun weekend lunch, these Pizza Poppers bring everyone to the table with their irresistible combination of familiar flavors and playful presentation.
I first created these Pizza Poppers when hosting a playdate for my son's friends, trying to find a solution to the usual pizza mess that inevitably ends up on my carpet. What began as a practical experiment turned into a runaway hit—not just with the kids but with their parents too! What surprised me most was how much more flavor seemed to be packed into each bite compared to regular pizza. My husband, who typically reaches for a second or third slice of pizza, found himself completely satisfied after a handful of these flavor-bomb bites. What I love most about this recipe is its versatility; I've made countless variations based on what ingredients we have on hand, and they're always a success. They've become our go-to solution for movie nights, quick lunches, and particularly busy evenings when we need a simple dinner that doesn't sacrifice flavor or fun.
Ingredients You'll Need
- 1 package Refrigerated Pizza Dough (or homemade): Forms the base of your poppers. Store-bought saves time, but homemade adds extra flavor if you have it
- ½ cup Pizza Sauce: Provides the classic tomato base flavor. Use store-bought or homemade, but make sure it's thick to prevent soggy poppers
- 1 cup Shredded Mozzarella Cheese: Creates that perfect melty, stretchy texture inside each popper. Freshly shredded melts better than pre-packaged
- ¼ cup Mini Pepperoni (or diced regular pepperoni): Adds classic pizza flavor and a slight spicy kick. Mini size works best for these small bites
- ¼ teaspoon Garlic Powder: Enhances the savory flavor profile with subtle garlic notes
- ¼ teaspoon Italian Seasoning: Contributes the traditional herb blend flavor that makes pizza taste authentic
- 2 tablespoons Butter, melted: Creates a golden, crispy exterior when brushed on top before baking
- 2 tablespoons Grated Parmesan Cheese: Adds a savory, salty finish to the exterior for extra depth of flavor
- 1 tablespoon Fresh Basil or Parsley, chopped (optional): Provides a fresh, aromatic finish and vibrant color contrast
Step-by-Step Cooking Instructions
- Prepare Your Baking Area:
- Begin by preheating your oven to 375°F (190°C). Line a baking sheet with parchment paper or lightly grease it with cooking spray. This preparation ensures your poppers won't stick and makes cleanup much easier. The parchment paper also helps the poppers develop an evenly crispy bottom as they bake. Position your oven rack in the middle position for the most consistent heat distribution.
- Prepare the Pizza Dough:
- On a lightly floured surface, roll out your pizza dough to approximately ⅛-inch thickness. If using refrigerated dough, let it come to room temperature for about 15 minutes first for easier handling. Using a pizza cutter or sharp knife, cut the dough into 24 equal squares, approximately 2x2 inches each. Don't worry if they're not perfectly uniform—part of the charm of homemade poppers is their rustic appearance. If the dough springs back while cutting, let it rest for a minute before continuing.
- Add Your Flavorful Fillings:
- Place a small dollop (about ½ teaspoon) of pizza sauce in the center of each dough square, being careful not to overfill or spread too close to the edges. Follow with a generous pinch of shredded mozzarella (about 2 teaspoons per square) and a few pieces of mini pepperoni or other chosen toppings. The key is restraint—too much filling will make the poppers difficult to seal and might cause leakage during baking. Remember that the flavors will concentrate as they bake, so a little goes a long way.
- Form the Perfect Popper:
- Working one piece at a time, carefully bring all four corners of the dough square up and together over the filling, then pinch the edges together firmly to seal, creating a small purse-like bundle. Ensure there are no openings where cheese could leak out during baking. If the dough isn't sealing properly, lightly dampen the edges with water to help them stick together. Roll the sealed popper gently between your palms to create a more rounded shape if desired.
- Arrange for Optimal Baking:
- Place each sealed popper seam-side down on your prepared baking sheet, spacing them about 1 inch apart to allow for expansion during baking. The seam-down position helps prevent them from opening while cooking and creates a smoother, more attractive top surface for the butter and seasonings. If any poppers appear to be coming unsealed, give them an extra pinch to secure the edges.
- Apply Flavor-Enhancing Topping:
- In a small bowl, combine the melted butter with the garlic powder. Using a pastry brush, gently brush the top and sides of each popper with this garlic butter mixture. The butter will help the exterior become golden and crispy while adding flavor. Immediately sprinkle each buttered popper with a bit of Italian seasoning and Parmesan cheese, which will stick to the butter and create a savory crust as they bake.
- Bake to Golden Perfection:
- Place the baking sheet in the preheated oven and bake for 10-12 minutes, or until the poppers are puffed up and golden brown. The exact time may vary depending on your oven, so start checking at the 10-minute mark. You'll know they're done when the tops are golden and the dough is fully cooked—no doughy spots should remain. If you notice some poppers browning faster than others, rotate the pan halfway through baking.
- Finish with Fresh Herbs:
- Remove the baking sheet from the oven and let the poppers cool for 2-3 minutes before serving. This brief cooling period allows the molten cheese inside to set slightly, making them easier to handle and less likely to burn mouths. Just before serving, sprinkle the tops with fresh chopped basil or parsley for a pop of color and fresh flavor that beautifully contrasts with the rich, savory poppers. The heat from the freshly baked poppers will release the aromatic oils in the herbs, enhancing the overall sensory experience.
Dipping Sauce Suggestions
Elevate your Pizza Poppers experience with complementary dipping options that enhance their flavor. Warm marinara sauce is a natural pairing that reinforces the classic pizza taste. Garlic butter sauce adds richness and complements the herbs in the poppers. For a creamy contrast, serve with a side of ranch dressing or create a quick pesto aioli by mixing prepared pesto with mayonnaise. A spicy option like Buffalo sauce or sriracha mayo appeals to heat-lovers and cuts through the richness of the cheese. Providing a variety of dipping options allows everyone to customize their popper experience and keeps the flavors interesting through the last bite.
Creative Variations
The basic Pizza Popper format welcomes endless flavor possibilities. For a breakfast version, fill with scrambled eggs, bacon bits, and cheddar cheese, then serve with maple syrup for dipping. Mediterranean-inspired poppers featuring feta, spinach, and sun-dried tomatoes create an elegant appetizer option. Dessert poppers filled with chocolate hazelnut spread and banana slices, then dusted with cinnamon sugar after baking, offer a sweet twist on the concept. For a spicy kick, incorporate diced jalapeños and pepper jack cheese into the filling. Experimenting with different cheeses like smoked gouda, brie, or blue cheese can transform the flavor profile while maintaining the irresistible gooey center.
Make-Ahead Options
These poppers are perfect for meal prep and entertaining because they can be prepared in advance. Assemble the poppers completely, place them on a baking sheet, cover with plastic wrap, and refrigerate for up to 24 hours before baking. For longer storage, freeze the unbaked poppers on a baking sheet until solid, then transfer to a freezer bag where they'll keep for up to three months. When ready to serve, bake the frozen poppers directly from the freezer at 375°F, adding about 3-5 minutes to the baking time. This make-ahead flexibility makes Pizza Poppers a stress-free solution for entertaining or busy weeknight dinners.
Serving Suggestions
While delicious on their own, Pizza Poppers can be the star of various meal concepts. Create a DIY snack board by arranging warm poppers alongside marinated olives, roasted red peppers, artichoke hearts, and sliced Italian meats for an antipasto-inspired spread. For a casual family dinner, serve with a simple green salad dressed in Italian vinaigrette for a balanced meal. At parties, place small bowls of different dipping sauces around platters of poppers to encourage guests to try different flavor combinations. For a hearty game day spread, pair with other finger foods like mozzarella sticks, chicken wings, and loaded potato skins.
Storage and Reheating
Though best enjoyed fresh from the oven, leftover Pizza Poppers can be stored in an airtight container in the refrigerator for up to three days. To reheat, place them on a baking sheet in a 350°F oven for 5-7 minutes until heated through and crispy again. This method preserves their texture much better than microwave reheating, which tends to make them soggy. If using a toaster oven, 3-4 minutes is usually sufficient. For the ultimate texture revival, consider reheating in an air fryer at 350°F for just 2-3 minutes, which will restore the crispy exterior while warming the filling to the perfect temperature.
 Pin it
Chef's Helpful Tips
- Rolling Pin Alternative - No rolling pin? Use a clean wine bottle or flatten dough with your hands on a well-floured surface
- Cheese Strategy - Mix a tablespoon of cornstarch with the shredded cheese to prevent excess moisture and leakage during baking
- Topping Technique - Create a small indentation in the dough before adding fillings to better contain the sauce and cheese
My first attempt at these poppers taught me an important lesson about portion control—I was too generous with the filling and ended up with more cheese on my baking sheet than inside the poppers! Now I know that a restrained approach to filling yields perfect results every time. Another game-changer was discovering that a double brushing of butter—once before baking and once immediately after—creates an even more irresistible crust with maximum flavor. My favorite memory with this recipe was during a neighborhood block party when a self-proclaimed 'pizza connoisseur' (who usually only eats from specific pizzerias) asked for the recipe after his third helping. The conversion of even the pickiest pizza lovers is a testament to how these simple bites capture the essence of great pizza in a new and exciting format.
I've made countless versions of these Pizza Poppers since that first playdate experiment, and they've become my signature contribution to gatherings with friends and family. What I find most satisfying is how they transform a familiar favorite into something that feels new and exciting, while actually being simpler to serve and eat. The playful, bite-sized format encourages sharing and conversation in a way that traditional pizza sometimes doesn't—there's something about these little bundles that brings people together around the table. Whether you're looking for a crowd-pleasing appetizer, a fun weekend lunch, or a creative way to use up leftover pizza ingredients, these versatile poppers deliver big pizza flavor in an irresistibly poppable package.
Frequently Asked Questions
- → Can I prepare these ahead of time?
- Yes! You can assemble the poppers up to 24 hours in advance and store them covered in the refrigerator until ready to bake. Alternatively, you can freeze the unbaked poppers on a baking sheet, then transfer to a freezer bag for up to 3 months. Bake from frozen, adding 3-5 minutes to the cooking time.
- → Can I add other pizza toppings?
- Absolutely! Feel free to customize with your favorite pizza toppings like cooked Italian sausage, diced ham, mushrooms, bell peppers, or olives. Just make sure to dice them small and avoid wet ingredients that could make the dough soggy. Pre-cook any raw meat or vegetables before adding.
- → Why are my poppers leaking cheese?
- This typically happens when the seams aren't sealed tightly enough. Make sure to pinch the edges firmly and roll the ball in your hands to ensure all seams are closed. Also, don't overfill the dough squares - a small amount of filling works best.
- → Can I make these with homemade pizza dough?
- Yes! Homemade pizza dough works perfectly. Roll it slightly thinner than you would for a regular pizza crust (about 1/8 inch thick) before cutting into squares. The cooking time may vary slightly, so keep an eye on them while baking.
- → How do I reheat leftover pizza poppers?
- For best results, reheat in a 350°F oven for 5-7 minutes until warmed through and crispy again. You can also use an air fryer at 350°F for 3-4 minutes. Microwave reheating works in a pinch (30-45 seconds), but the texture won't be as crispy.