
 Pin it
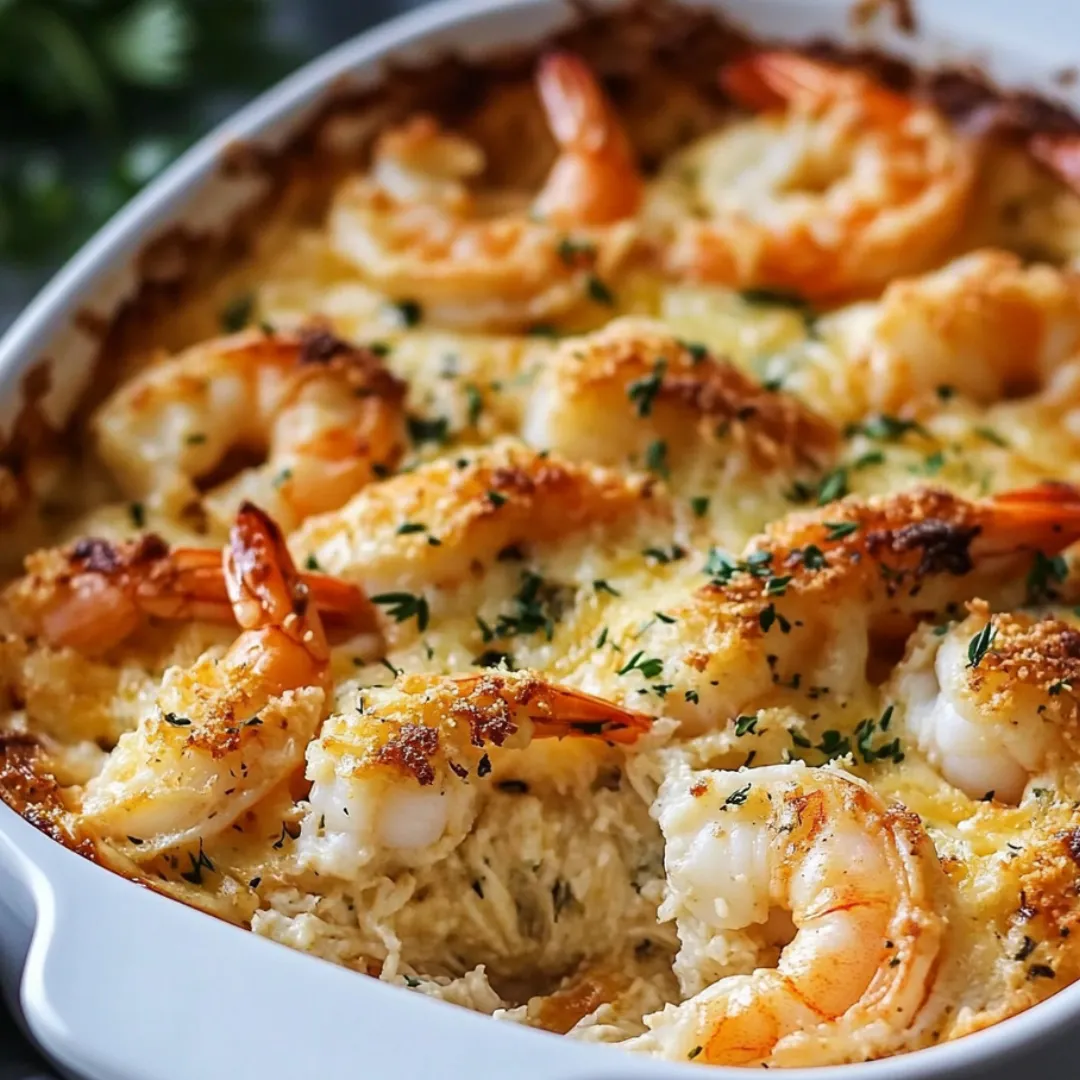
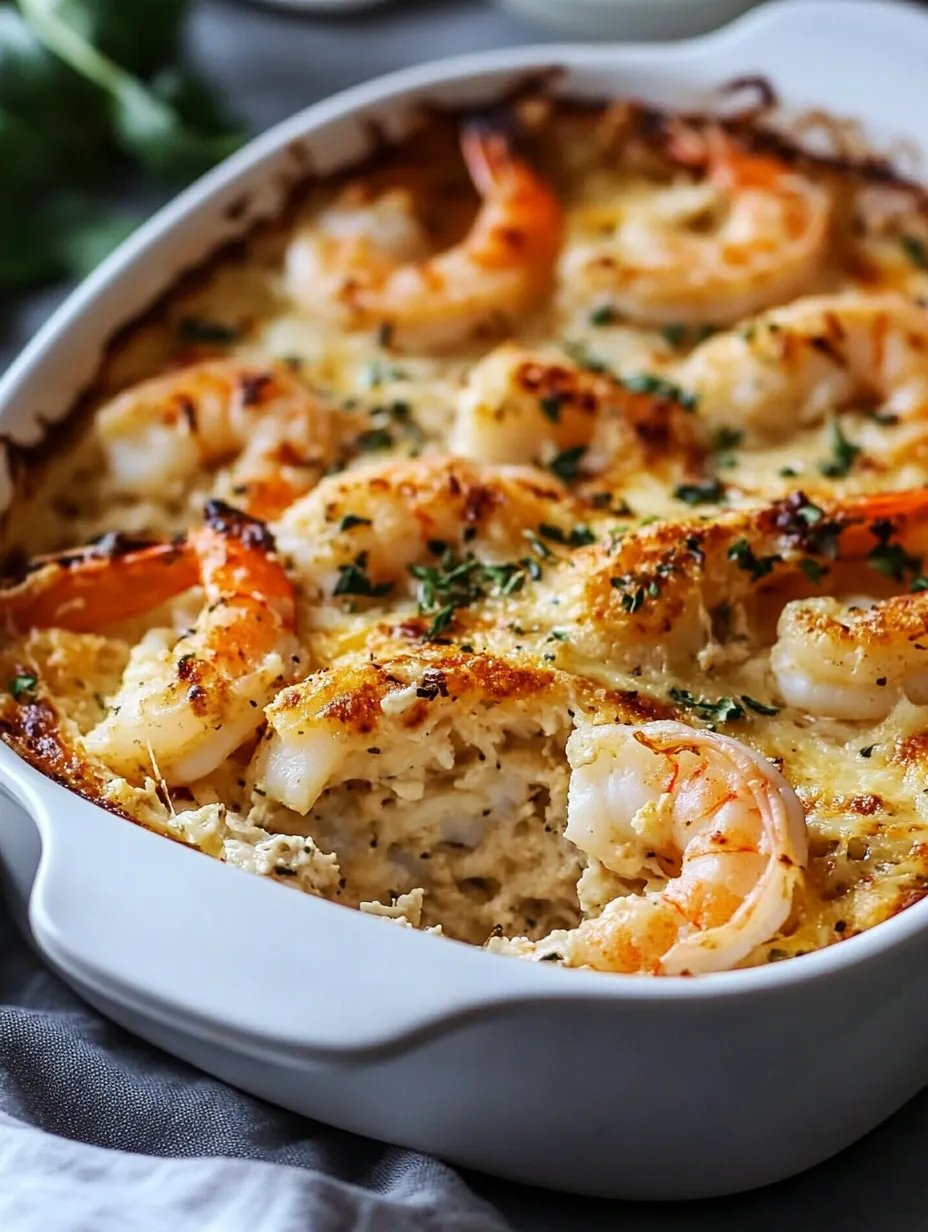
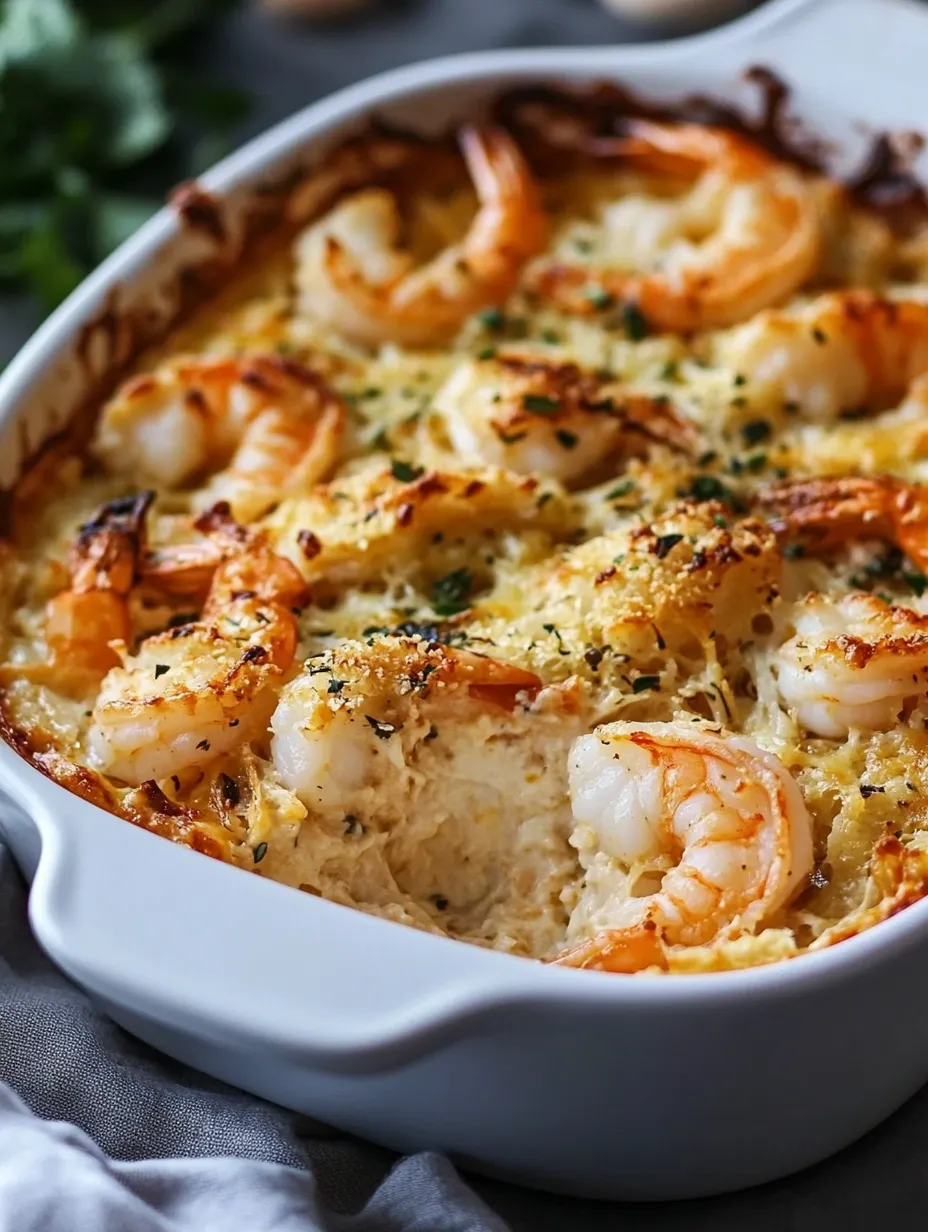
This golden-topped Baked Stuffed Shrimp Casserole combines plump, tender shrimp with a savory, herb-infused stuffing for a dish that feels both indulgent and refined. The contrast between the succulent seafood and crispy, seasoned topping creates a perfect textural balance that makes each bite memorable. Though it looks and tastes like you spent hours in the kitchen, this impressive dish comes together with surprising ease, making it perfect for both special occasions and elevated weeknight dinners.
The first time I served this stuffed shrimp casserole was during a last-minute dinner party when I needed something impressive without spending the entire day in the kitchen. I still remember my friend Lisa's expression when she took her first bite – eyes closed, a slow smile spreading across her face before declaring it better than the stuffed shrimp at her favorite seafood restaurant. What began as a rushed solution has become my signature dish, requested at nearly every gathering. The best part is watching guests try to pace themselves but inevitably reaching for seconds while asking for my "secret" recipe.
Ingredients
- 1 pound shrimp, peeled and deveined: The star of this dish deserves careful selection. Look for large or jumbo shrimp (16-20 count per pound) with a fresh, oceanic smell and firm texture. Wild-caught varieties typically offer superior flavor, though sustainable farm-raised options work well too. If using frozen shrimp, thaw completely in the refrigerator and pat dry before using. Leave the tails on for presentation if serving for a special occasion, or remove them completely for easier eating at family dinners. The shrimp should be completely cleaned with the digestive tract (the dark line along the back) removed.
- 1 tablespoon olive oil: Creates the foundation for sautéing vegetables without overpowering the delicate seafood flavors. Choose a good-quality extra virgin olive oil with a smooth, fruity profile rather than a strongly peppery one. The oil should have a bright green hue and pleasant aroma, indicating freshness. While you could substitute butter for a richer result, olive oil's higher smoke point makes it better for sautéing without burning.
- ½ cup celery, diced: Provides essential crunch and aromatic base flavor. Select crisp, bright green stalks without blemishes or limpness. For the most consistent texture, dice the celery into small, even pieces (about ¼-inch cubes). The inner, lighter stalks often offer a milder, sweeter flavor that works particularly well in this dish. Fresh celery should snap cleanly when bent and have no discoloration at the cut ends.
- ½ cup onion, diced: Contributes sweet, aromatic depth that permeates the entire dish. Yellow or white onions work equally well, though yellow offers a slightly sweeter profile. Look for firm onions with intact, papery skin and no soft spots. Dice into pieces the same size as the celery for consistent cooking and textural harmony. Fresh onions should feel heavy for their size and have no sprouting from the top.
- 1 clove garlic, minced: Adds essential aromatic notes that elevate the entire dish. Choose firm garlic cloves without any green sprouts in the center, which can contribute bitterness. Mince the garlic very finely to ensure it cooks quickly and distributes its flavor evenly throughout the stuffing. Fresh garlic should feel firm, never soft or spongy, and have a strong, clean scent when cut.
- 1 cup gluten-free breadcrumbs: Forms the foundation of the crispy, flavorful stuffing. Look for brands made with minimal ingredients and no artificial additives. Panko-style gluten-free breadcrumbs offer superior crunch, but any variety will work well. The breadcrumbs should be fresh and smell lightly toasted, not stale or rancid. If you don't require gluten-free options, traditional breadcrumbs can be substituted in equal amounts.
- ¼ cup grated parmesan cheese: Provides savory depth and helps create a beautiful golden crust. Choose authentic Parmigiano-Reggiano and grate it fresh for the best flavor and melting properties. The cheese should have a firm texture and nutty aroma. Pre-grated varieties often contain anti-caking agents that can affect flavor and texture, so freshly grated is strongly preferred. The cheese adds essential umami notes that complement the sweetness of the shrimp perfectly.
- 1 tablespoon fresh parsley, chopped: Contributes bright color and herbaceous freshness. Select bunches with vibrant green leaves and no yellowing or wilting. Italian flat-leaf parsley offers more robust flavor than curly varieties. Chop the leaves finely, avoiding tough stems. Fresh parsley should have a clean, grassy scent and crisp texture. While dried parsley could be substituted in a pinch (use 1 teaspoon), the fresh version provides superior flavor and visual appeal.
- 1 tablespoon lemon juice: Brightens all the flavors with essential acidity. Always use freshly squeezed lemon juice rather than bottled for clean, vibrant flavor. A medium lemon typically yields about 2-3 tablespoons of juice, so you'll need less than half a lemon. The juice should be strained to remove any seeds or pulp that could affect the texture of the stuffing. This ingredient is crucial for balancing the richness of the seafood and cheese.
- Salt and pepper to taste: Enhances all other flavors and brings the dish into perfect balance. Sea salt or kosher salt provides cleaner flavor than table salt. Freshly ground black pepper offers far superior flavor to pre-ground. Season conservatively at first, as the parmesan cheese already contributes significant saltiness. You can always add more after tasting the stuffing mixture but can't remove excess.
 Pin it
Step-by-Step Instructions
- Step 1: Prepare your kitchen workspace
- Begin by organizing your kitchen for efficient cooking. Preheat your oven to 350°F (175°C), positioning the rack in the center for even heat distribution. This moderate temperature allows the shrimp to cook gently while the breadcrumb topping achieves a perfect golden brown. Take out a shallow baking dish approximately 9x13 inches and lightly coat it with cooking spray or a thin layer of olive oil to prevent sticking. Gather all your ingredients and measuring tools before starting to ensure smooth preparation. If you haven't already, peel and devein the shrimp, leaving tails on if desired for presentation. Rinse the prepared shrimp under cold water, then pat thoroughly dry with paper towels – this crucial step ensures they'll roast properly rather than steam in excess moisture.
- Step 2: Create the aromatic flavor base
- Place a medium skillet over medium heat and allow it to warm up completely before adding the olive oil. Once the oil shimmers slightly but doesn't smoke, add the diced celery and onion. Sauté these aromatics, stirring occasionally with a wooden spoon, until they begin to soften and become translucent, about 3-4 minutes. The vegetables should reduce in volume and develop a slight sweetness without browning. In the last minute of cooking, add the minced garlic, stirring constantly to prevent it from burning. The garlic should become fragrant but not brown, which takes approximately 30-60 seconds. Remove the skillet from heat and allow this mixture to cool slightly before proceeding. This cooling period prevents the hot vegetables from potentially cooking the other ingredients when combined.
- Step 3: Prepare the flavorful stuffing mixture
- In a medium mixing bowl, combine the sautéed vegetable mixture with the gluten-free breadcrumbs, ensuring they're distributed evenly. Add the freshly grated parmesan cheese, chopped parsley, and fresh lemon juice to the bowl. The bright acidity of the lemon juice balances the richness of the cheese and complements the sweetness of the shrimp. Season the mixture with salt and freshly ground black pepper, starting with about ¼ teaspoon of salt and a few grinds of pepper. Using a fork or your hands, gently mix all ingredients until thoroughly combined but not compacted. The stuffing should have a loose, crumbly texture that will crisp beautifully in the oven. If the mixture seems too dry, you can add a teaspoon of olive oil; if too wet, add a tablespoon of additional breadcrumbs.
- Step 4: Prepare the shrimp for stuffing
- Working with one shrimp at a time, make a butterfly cut along the back where the vein was removed, being careful not to cut all the way through. The shrimp should open like a book while remaining connected along one edge. This creates maximum surface area for the delicious stuffing while keeping each shrimp intact. Lay the butterflied shrimp flat on your work surface, pressing gently to open them fully. If the shrimp are particularly large, you can make a slightly deeper cut to create more space for stuffing. For smaller shrimp, a shallower cut works better to prevent them from falling apart. The goal is to create a pocket that will hold a generous amount of stuffing while maintaining the shrimp's structural integrity during baking.
- Step 5: Fill each shrimp generously
- Using a small spoon or your fingers, place approximately 1-2 teaspoons of the breadcrumb mixture onto each butterflied shrimp, adjusting the amount based on the shrimp's size. Press the stuffing gently into the cavity, creating a slight mound. Don't worry if some stuffing falls off – this creates delicious crispy bits in the finished dish. Arrange the stuffed shrimp in your prepared baking dish, positioning them so the stuffed sides face upward. The shrimp can be placed close together but should not overlap significantly. If you have any remaining stuffing mixture, sprinkle it over the arranged shrimp, focusing on any areas that seem less generously covered. This ensures every bite has the perfect balance of seafood and crispy topping.
- Step 6: Bake to golden perfection
- Place the baking dish on the center rack of your preheated oven. Bake for 15-20 minutes, watching carefully during the final minutes. The exact cooking time depends on the size of your shrimp and the depth of your baking dish. Look for three key signs of doneness: the shrimp should turn from translucent gray to opaque pink throughout, the stuffing should develop a rich golden-brown color, and the shrimp should feel firm but not rubbery when gently pressed. If the stuffing browns too quickly while the shrimp still appear undercooked, loosely cover the dish with aluminum foil for the remaining cooking time. Properly cooked shrimp curl into a loose "C" shape – if they form a tight "O," they've overcooked and may become tough.
- Step 7: Let rest briefly before serving
- Once removed from the oven, allow the casserole to rest for 2-3 minutes before serving. This brief resting period allows the juices to redistribute throughout the shrimp and the stuffing to set slightly, making for neater serving. The casserole will remain hot during this short rest without the shrimp becoming overcooked. If desired, squeeze a little additional fresh lemon juice over the top just before serving to brighten the flavors, or place lemon wedges on the side for guests to use according to their preference. The dish should be served hot, while the contrast between the crisp topping and tender shrimp is at its peak.
- Step 8: Serve with complementary sides
- Transfer the stuffed shrimp to warmed serving plates, arranging them attractively. This dish pairs beautifully with simple sides that won't compete with its delicate flavors. Consider serving alongside a light lemon-dressed arugula salad, steamed asparagus, or a small portion of angel hair pasta tossed with olive oil and herbs. For a more substantial meal, wild rice or roasted fingerling potatoes make excellent accompaniments. A chilled glass of unoaked Chardonnay or Pinot Grigio complements the seafood flavors perfectly. The presentation should highlight the beautiful golden tops of the stuffed shrimp, perhaps with a small garnish of additional chopped parsley or a lemon twist for color.
A New England Tradition Reimagined
This Baked Stuffed Shrimp Casserole draws inspiration from the rich culinary traditions of New England, where seafood casseroles frequently grace holiday tables and special occasions. My maternal grandmother, who grew up in a small coastal town in Massachusetts, prepared a version of this dish for Christmas Eve gatherings throughout my childhood. Her traditional recipe called for Ritz crackers and an abundance of butter – delicious, but quite heavy.
When I developed dietary sensitivities in my thirties, I feared losing connection to these cherished family recipes. This reimagined version maintains all the nostalgic flavors I associate with special family gatherings while accommodating modern dietary needs. The substitution of gluten-free breadcrumbs for traditional crackers and the addition of fresh herbs and lemon create a lighter profile without sacrificing the comforting essence of the original.
What I appreciate most about this updated version is how it honors tradition while feeling thoroughly contemporary. The dish remains special enough for holiday celebrations but has found its way into our regular meal rotation because it's no longer reserved only for indulgent occasions. I've served it for milestone birthdays, casual summer dinners on the deck, and even prepared it for a beach picnic once (served at room temperature, it was surprisingly delightful).
The Perfect Balance of Simplicity and Elegance
One of the most appealing aspects of this Baked Stuffed Shrimp Casserole is how it strikes the perfect balance between impressive presentation and straightforward preparation. It embodies what I consider the holy grail of entertaining recipes: a dish that looks and tastes like it required significantly more effort than it actually did.
The straightforward preparation belies the complex layers of flavor in the finished dish. The sautéed aromatics create a foundation of savory depth, while the parmesan provides rich umami notes that complement the natural sweetness of the shrimp. Fresh herbs and lemon add brightness that prevents the dish from feeling heavy. Each element plays an essential role in creating the perfectly balanced whole.
I particularly value this recipe when entertaining guests with varying dietary needs. The gluten-free adaptation requires no special announcement or separate preparation – it's simply a delicious seafood dish that happens to be gluten-free. I've served it to mixed groups where some guests had dietary restrictions and others didn't, and no one has ever noticed the gluten-free aspect unless I mention it. This inclusivity without compromise is the marker of a truly successful recipe adaptation.
 Pin it
Seasonal Variations to Keep It Fresh
The beauty of this stuffed shrimp casserole lies not only in its classic appeal but also in its adaptability throughout the year. I've created seasonal variations that keep this beloved recipe in regular rotation regardless of the season or occasion.
During summer months when herbs flourish in my garden, I often replace the parsley with a combination of fresh basil and chives, adding bright notes that complement the season's produce. A side of grilled summer vegetables or a simple tomato salad makes this a perfect warm-weather meal that doesn't overwhelm with heaviness.
In autumn, I add finely diced apple and a pinch of thyme to the stuffing mixture, creating subtle sweetness and warmth that feels appropriate as temperatures drop. Served alongside roasted root vegetables, this variation bridges the transition from summer's lightness to winter's comfort.
Winter holidays call for a more traditional approach, sometimes with the addition of a small amount of chopped crabmeat to the stuffing for extra indulgence. The red of the shrimp against the golden topping creates a festive presentation perfect for holiday tables. I often prepare this version on Christmas Eve, continuing my grandmother's tradition while adapting it for our modern palates.
I learned the importance of properly selecting and preparing shrimp during an unfortunate dinner party experience early in my cooking journey. Attempting to economize, I purchased small cocktail shrimp instead of the larger varieties recommended for stuffing. As they cooked, these tiny shrimp curled into tight circles, causing most of the stuffing to fall off. What emerged from the oven was essentially a breadcrumb casserole with shrimp accents – tasty, but not at all what I had envisioned. A kind guest gently suggested that "jumbo is the way to go" for stuffed shrimp, advice I've faithfully followed ever since. This experience taught me that sometimes investing in quality ingredients is essential to the success of a relatively simple recipe.
After countless preparations of this Baked Stuffed Shrimp Casserole over the years, I'm still charmed by its ability to feel special regardless of the occasion. There's something deeply satisfying about transforming simple ingredients into something that consistently earns rave reviews and recipe requests. Whether I'm preparing it for a quiet family dinner or a celebration with friends, the ritual of stuffing each shrimp has become a form of culinary meditation – a brief period of focus and care that translates directly to the pleasure of those gathered around my table. In a world of increasingly complex cooking trends and techniques, there's profound joy in a straightforward recipe that simply works, time after time, bringing happiness with every golden, flavorful bite.
Frequently Asked Questions
- → Can I prepare this dish ahead of time?
- Yes! You can prepare the stuffing and stuff the shrimp up to 6 hours ahead. Keep refrigerated and add 2-3 minutes to the baking time when cooking from cold.
- → What size shrimp works best for this recipe?
- Large or jumbo shrimp (16-20 count per pound) work best for stuffing. They're easier to handle and provide more space for the delicious breadcrumb mixture.
- → Can I use regular breadcrumbs if I don't need it to be gluten-free?
- Absolutely! Regular or panko breadcrumbs work perfectly in this recipe if you don't require a gluten-free option.
- → What side dishes pair well with this casserole?
- Simple sides like roasted asparagus, a green salad, or lemon butter rice complement this dish beautifully without overpowering the delicate shrimp flavor.
- → How can I tell when the shrimp are fully cooked?
- Properly cooked shrimp will be pink, slightly firm to the touch, and opaque all the way through. Be careful not to overcook as they can become tough and rubbery.