
 Pin it
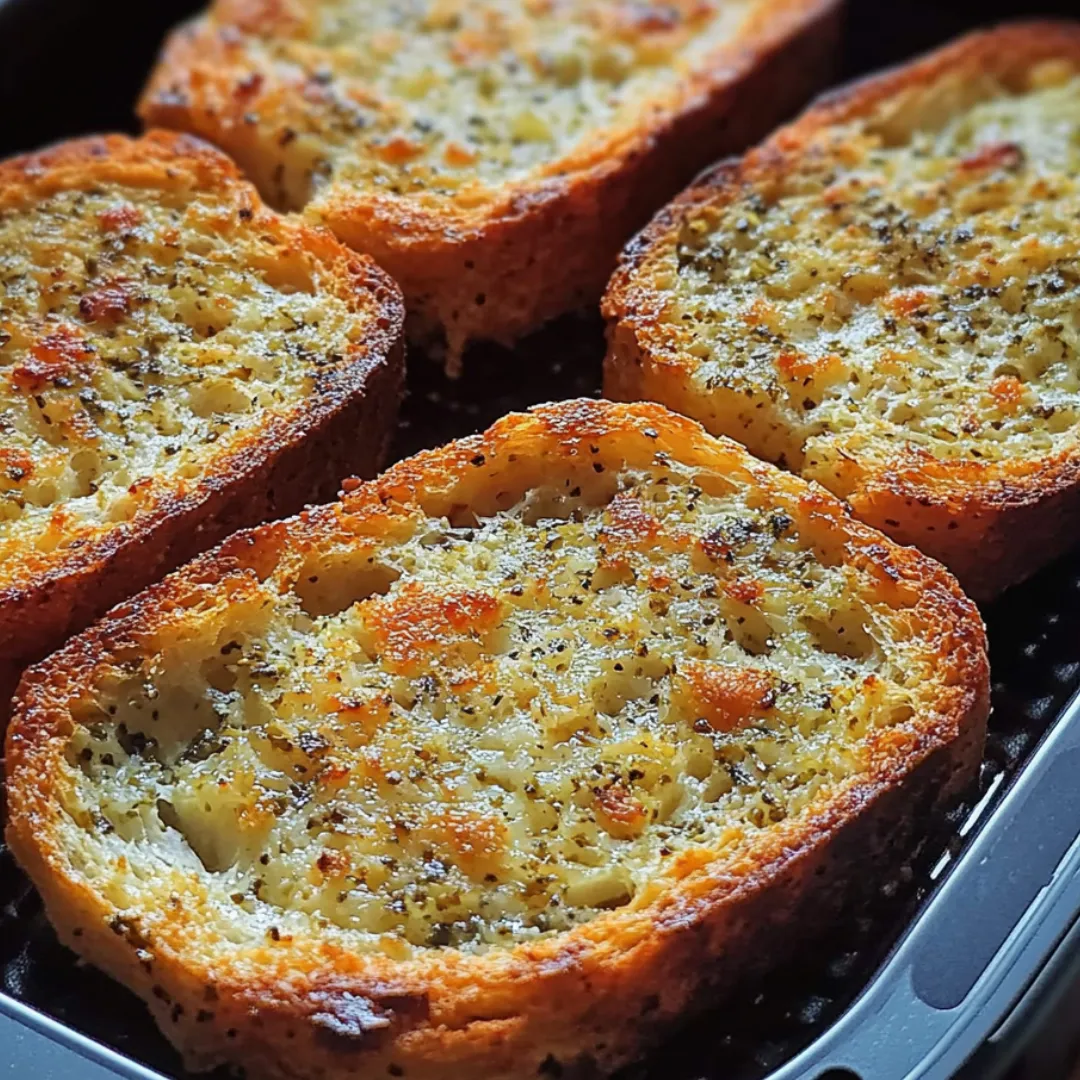
This air fryer garlic bread transforms ordinary bread into an extraordinary side dish with minimal effort and maximum flavor. The quick cooking method creates the perfect contrast between the crispy exterior and soft interior while allowing the buttery garlic mixture to permeate every bite. Unlike oven-baked versions that can sometimes dry out or take too long to heat, the air fryer circulates hot air rapidly around each slice, creating that ideal texture in just minutes. The concentrated heat caramelizes the garlic and browns the butter, developing complex flavors that make this simple bread irresistible whether served alongside pasta, soup, or enjoyed on its own.
I discovered the magic of air fryer garlic bread during a dinner emergency when my oven unexpectedly stopped working mid-meal prep. With hungry guests arriving in minutes and a pot of pasta sauce simmering, I desperately tried making garlic bread in my rarely-used air fryer. The results weren't just a successful backup plan – they were actually better than my usual oven method! The bread developed the most beautiful golden color with perfectly crispy edges while staying tender inside. Now I actually prefer this method and haven't gone back to the oven version since.
Ingredients You'll Need
- 1 loaf French or Italian bread: provides the essential base for your garlic bread; French bread offers a crispier crust with soft interior, while Italian bread tends to have a slightly denser texture; either works beautifully, so choose based on personal preference
- ½ cup butter, softened: creates the rich, velvety foundation for the spread; using room temperature butter makes mixing easier and allows for more even application; unsalted gives you better control over the final salt level
- 4-5 garlic cloves, minced: delivers that distinctive aromatic flavor that defines good garlic bread; fresh cloves provide significantly more punch than pre-minced versions; adjust quantity up or down depending on your garlic tolerance
- 2 tablespoons fresh parsley, finely chopped: adds bright, herbaceous notes and visual appeal; flat-leaf Italian parsley offers more pronounced flavor than curly varieties
- ¼ cup Parmesan cheese, freshly grated: contributes savory depth and subtle nuttiness; freshly grated melts more evenly and tastes far better than pre-packaged versions
- ¼ teaspoon black pepper, freshly ground: provides gentle heat and complexity that enhances the other flavors; freshly ground delivers more aromatic oils than pre-ground
- 1 teaspoon Italian seasoning or dried oregano (optional): introduces additional herbal notes that complement the garlic and butter; use if you want a more pronounced Italian flavor profile
 Pin it
Step-by-Step Cooking Instructions
- Prepare your bread properly:
- Start by selecting a quality loaf of French or Italian bread – the foundation of great garlic bread. Using a sharp serrated knife, slice the loaf into pieces approximately ½-inch thick. This thickness is crucial – too thin and the bread will dry out and potentially burn, too thick and the center may remain soft while the edges overcook. Cutting at a slight angle creates more surface area for the garlic butter, maximizing flavor in every bite. For smaller air fryers, you may need to cut the slices in half to fit them properly in the basket.
- Create the perfect garlic butter mixture:
- In a medium bowl, combine the softened butter with minced garlic, chopped parsley, grated Parmesan, and freshly ground black pepper. Using a fork or rubber spatula, mix thoroughly until all ingredients are evenly incorporated into a smooth, uniform spread. The softened butter should easily accept the additions without leaving lumps. Take time with this step to ensure even distribution of the garlic throughout the mixture. If you prefer a stronger garlic flavor, let this mixture rest for 5-10 minutes before spreading, allowing the garlic oils to infuse into the butter.
- Apply the spread with proper technique:
- Using a butter knife or small offset spatula, generously apply the garlic butter mixture to one side of each bread slice. Spread it evenly to the edges, creating a layer approximately ⅛-inch thick. Be particularly generous around the perimeter of the bread, as these areas tend to dry out first in the air fryer. The butter acts as both flavoring and a protective barrier against excessive drying. Don't worry about being too precise – the rustic, uneven application adds character to the final product and allows for pockets of more intense flavor.
- Master the air fryer cooking method:
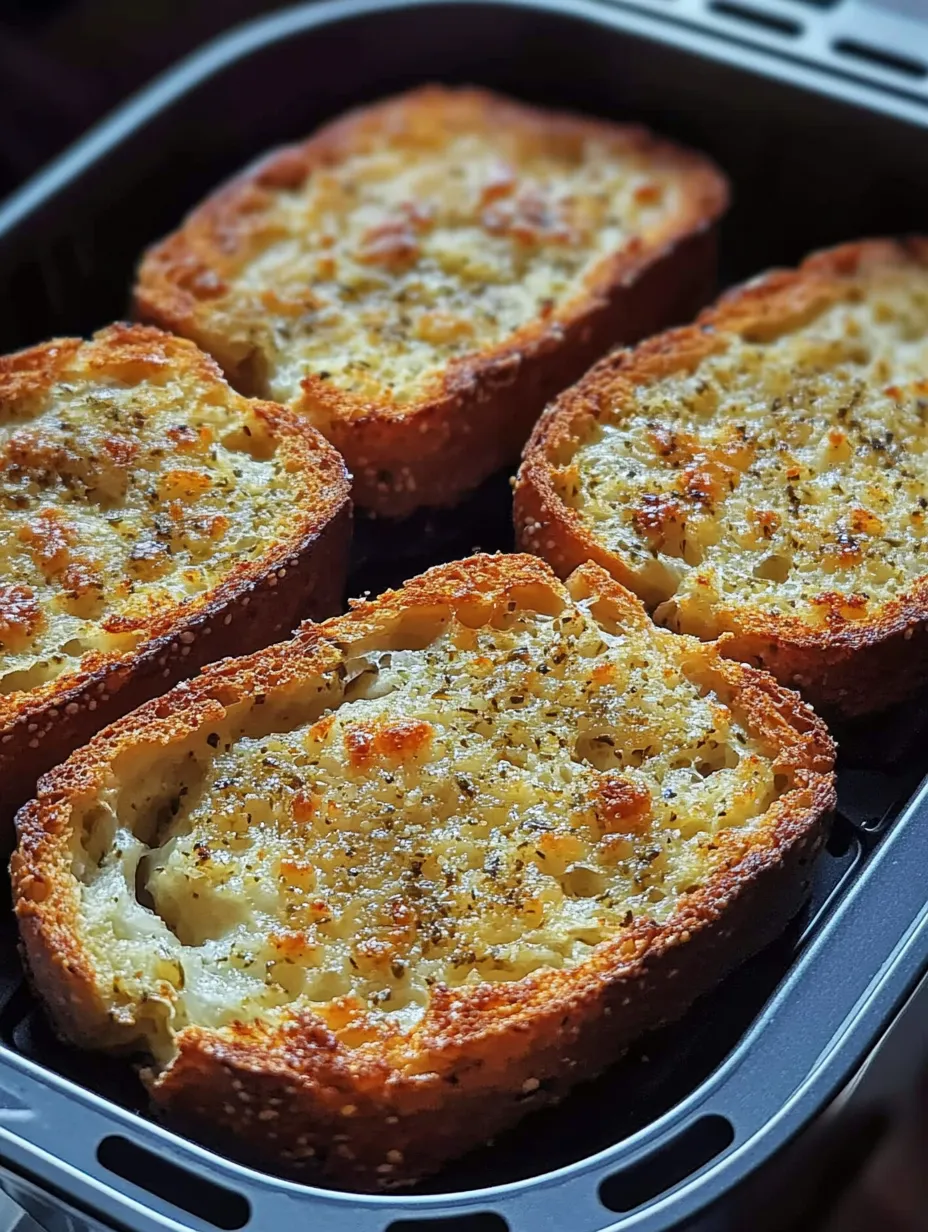
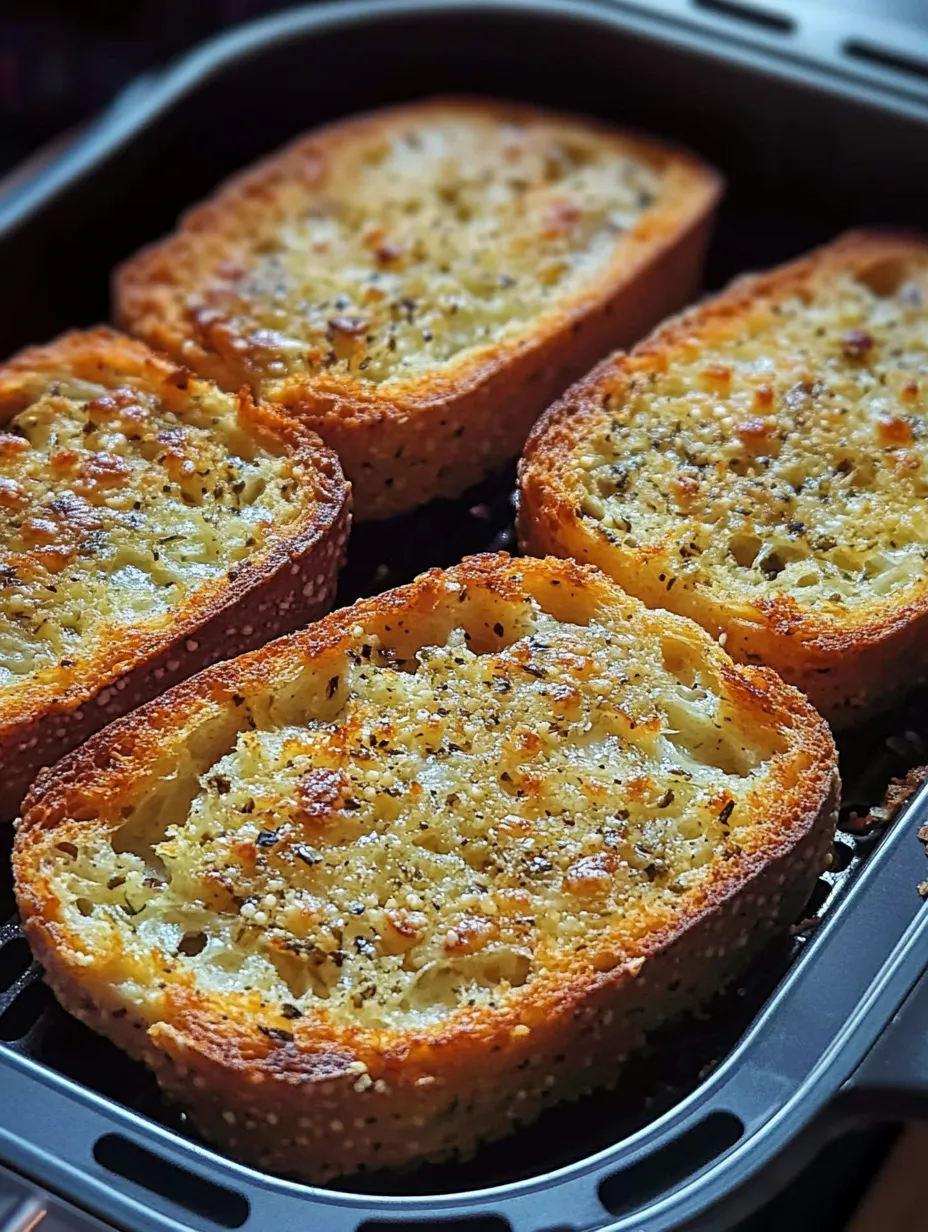
- Preheat your air fryer to 350°F (175°C) for 2-3 minutes. This ensures the bread starts cooking immediately upon entering the basket rather than gradually heating up, which can result in uneven cooking. Arrange the bread slices in a single layer in your air fryer basket, buttered side up, being careful not to overcrowd. Leave small spaces between pieces to allow for proper air circulation. Depending on your air fryer's size, you'll likely need to work in batches of 3-4 slices at a time.
- Monitor for perfect doneness:
- Cook the garlic bread for 4-6 minutes, checking at the 3-minute mark for doneness. Look for a golden brown surface with slight bubbling of the butter and edges that have just begun to darken. The exact timing will vary based on your specific air fryer model and the thickness of your bread. Use tongs to carefully remove a slice and test it – the ideal garlic bread should have a satisfying crunch on the outside while maintaining some tenderness inside. Continue cooking in 1-minute increments if needed until you achieve your preferred level of crispness.
- Finish with optional flourishes:
- Once all batches are cooked, arrange the garlic bread on a serving platter. For an extra touch of flavor, you can sprinkle the hot bread with a little additional Parmesan cheese, which will melt slightly from the residual heat, or add a light dusting of Italian seasoning or oregano for enhanced visual appeal and aroma. Serve immediately while still warm to experience the optimal contrast between the crispy exterior and softer interior.
The combination of garlic and butter has been my comfort food since childhood. My grandmother would make garlic bread to accompany her pasta dishes, and the entire house would fill with that mouthwatering aroma. I remember standing on a stool in her kitchen, watching her generous hand with butter and how she never measured the garlic – 'You measure with your heart,' she'd say. This air fryer version captures that same rich flavor but with a crispier texture that my grandmother could never achieve in her oven. Every time I make it, that familiar garlic-butter fragrance brings me right back to her warm kitchen and those family Sunday dinners.
Preventing Burnt Garlic Pitfalls
One challenge with garlic bread is avoiding burnt garlic, which can create bitter flavors that overwhelm the entire dish. The air fryer method actually helps prevent this common problem thanks to its controlled cooking environment. The rapid air circulation cooks the bread quickly before the garlic has time to burn, unlike oven broilers that can scorch garlic in seconds if not watched carefully. For extra insurance against bitterness, use very finely minced garlic rather than roughly chopped pieces, which allows it to meld better with the butter and cook more evenly. Some professional chefs even recommend briefly sautéing the minced garlic in a small amount of the butter before creating the spread, which takes the raw edge off while preserving the flavor. This pre-cooking step isn't necessary with this air fryer method, but it's an option for those particularly sensitive to garlic's pungency.
Creative Variations Worth Trying
While the classic recipe delivers incredible flavor, experimenting with variations can keep this side dish exciting meal after meal. For a Mediterranean twist, add finely chopped sun-dried tomatoes and crumbled feta to the butter mixture, along with a pinch of dried oregano. Herb lovers can create a garden-fresh version by incorporating additional fresh herbs like basil, thyme, or rosemary alongside the parsley. For spice enthusiasts, adding red pepper flakes or a few drops of hot sauce to the butter mixture creates a gentle heat that contrasts beautifully with the rich butter. A sweet-savory variation that pairs wonderfully with soups incorporates a drizzle of honey over the finished bread right after air frying. My personal favorite variation adds finely grated lemon zest to the butter mixture, which brings brightness that cuts through the richness and complements the garlic beautifully.
Practical Make-Ahead Strategies
This garlic bread adapts well to busy schedules with some simple preparation adjustments. The garlic butter mixture can be made up to three days ahead and stored covered in the refrigerator – simply remove it about 30 minutes before using to soften for easier spreading. For partially prepared make-ahead garlic bread, spread the mixture on the slices, arrange them on a baking sheet, and freeze until solid, then transfer to a freezer bag where they'll keep for up to a month. When ready to serve, place the frozen slices directly in the preheated air fryer, adding just 1-2 minutes to the cooking time. For entertaining, prepare multiple batches just slightly shy of fully browned, then give them a final minute in the air fryer just before serving for that fresh-made taste and texture that will impress your guests without keeping you tied to the kitchen.
Perfect Pairing Suggestions
The versatility of garlic bread extends far beyond the traditional pairing with pasta. Its robust flavors complement a wide range of dishes across various cuisines. It serves as an excellent dipper for hearty soups like minestrone or roasted tomato, where the crisp texture holds up well when dunked. The bread provides a perfect counterpoint to salads with bold flavors, such as Caesar or Greek, offering satisfying contrast to the fresh vegetables. For an elevated appetizer, top each piece with a small portion of bruschetta mixture or olive tapenade. On casual evenings, pair it with roasted chicken or grilled steak, using the bread to soak up the flavorful juices. For a simple yet satisfying light meal, serve alongside a cheese board with various soft and hard cheeses, cured meats, and fresh fruit – the garlic bread adds a warm, savory element that elevates the entire spread.
 Pin it
Troubleshooting Common Issues
Even this straightforward recipe can sometimes present challenges. If your garlic bread emerges from the air fryer too soft and lacking crispness, your air fryer temperature may be running low or you might be overcrowding the basket. Try increasing the temperature by 15 degrees or reducing the number of slices per batch. Conversely, if the bread is burning before the center warms through, reduce the temperature and move the rack position lower in your air fryer if that's an option. For garlic butter that's sliding off the bread during cooking, chill the prepared slices for 10 minutes before air frying, which helps the butter set slightly. If the garlic flavor is too intense or slightly bitter, next time use a bit less garlic or try roasting the garlic cloves before mincing to mellow the flavor. For butter that's difficult to spread because it's not soft enough, grate cold butter using a cheese grater, then mix with the other ingredients for easier application.
My final thought on air fryer garlic bread is that it perfectly represents how modern kitchen tools can sometimes improve upon traditional methods in unexpected ways. The air fryer isn't just a convenient shortcut here – it actually produces a superior garlic bread with the ideal balance of textures and perfectly developed flavors in less time than conventional methods. I've served this alongside elaborate homemade pasta dishes and humble bowls of soup, and it consistently receives more compliments than dishes that took hours to prepare. Sometimes the simplest foods, when made with attention to detail and quality ingredients, create the most lasting impressions and become the recipes we return to again and again.
Frequently Asked Questions
- → Can I use pre-made garlic butter for this recipe?
- Yes! Store-bought garlic butter works perfectly for this recipe and makes it even quicker. Just spread it on the bread and air fry as directed in the recipe.
- → How can I make this recipe dairy-free?
- Substitute the butter with a plant-based butter alternative and skip the parmesan cheese or use a dairy-free cheese substitute. The garlic and herbs will still give you delicious flavor.
- → Can I add cheese on top of the garlic bread?
- Absolutely! For cheesy garlic bread, add slices of mozzarella or a sprinkle of additional parmesan on top during the last 1-2 minutes of cooking time until melted and bubbly.
- → What's the best way to store leftover garlic bread?
- Wrap cooled leftovers in aluminum foil and store at room temperature for up to 2 days. Reheat in the air fryer at 320°F for 2-3 minutes to restore crispiness.
- → What can I serve with this garlic bread?
- This garlic bread pairs perfectly with pasta dishes, soups, salads, or as an appetizer with marinara dipping sauce. It's also great alongside grilled meats or roasted vegetables.