
 Pin it
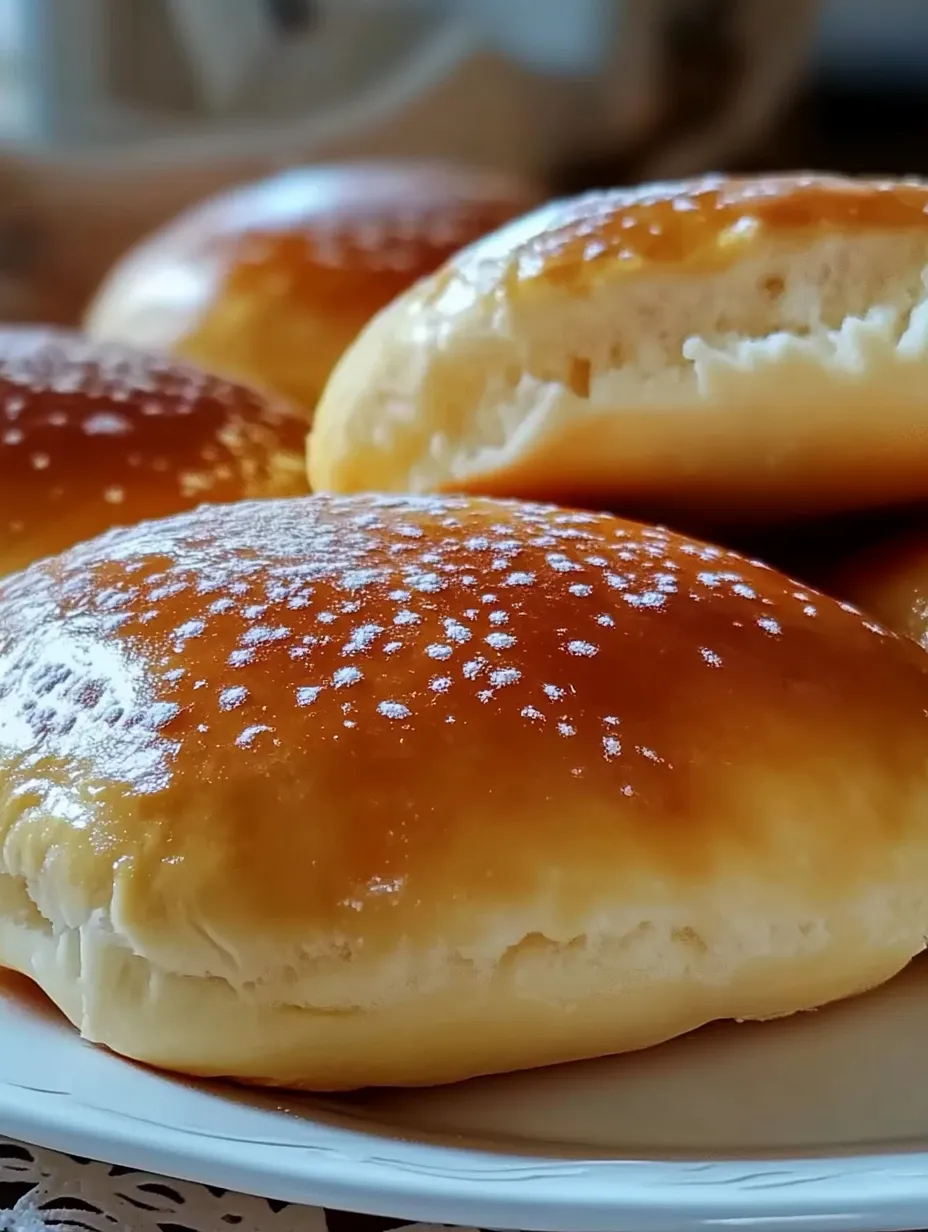
This quick homemade bread dough transforms everyday ingredients into a versatile base for countless bread creations without the typical hours of waiting. The pillowy texture and rich flavor make it hard to believe this dough comes together in just minutes. The perfect balance of whole wheat and bread flour creates a satisfying chew while maintaining a tender crumb that store-bought dough tubes simply can't match.
The first time I made this quick dough recipe was during a hectic Tuesday evening when my daughter announced she needed homemade bread for a school project—due the next morning. Panic set in as I mentally calculated the hours needed for traditional bread dough. Out of desperation, I experimented with instant yeast and a shortened rest time. The resulting rolls were so impressive that my daughter's teacher requested the recipe! Since that night, this dough has saved countless dinners when time seemed too short for anything homemade.
Ingredients
- 1 packet (2¼ teaspoons) instant yeast: The foundation of this quick dough and the key to eliminating long rise times. Look for packages labeled "instant" or "rapid-rise" rather than "active dry." The granules should appear fine and powdery, not in larger bits like active dry yeast. Fresh yeast is crucial—check the expiration date, as expired yeast won't create the necessary rise. Store unopened packets in a cool, dry place, and opened yeast in an airtight container in the refrigerator.
- 1 tablespoon granulated sugar: Feeds the yeast and helps create that perfect golden crust when baked. Regular white granulated sugar works perfectly, though organic cane sugar adds a subtle depth. The sugar should be free-flowing without any clumps, which would indicate moisture exposure. Beyond feeding the yeast, this small amount adds just enough sweetness to balance the flavors in the finished bread without making it taste sweet.
- 2 tablespoons extra virgin olive oil: Adds richness and helps create a tender crumb structure. Choose a good quality olive oil with a flavor you enjoy, as it will contribute to the final taste. The oil should smell fresh and fruity, not rancid. This ingredient also helps extend the shelf life of your finished bread and improves the texture by coating some of the flour proteins, preventing them from forming too much gluten.
- 1 cup warm water (110°F): Activates the yeast without killing it. The temperature is crucial—too hot will kill the yeast, too cool won't activate it properly. Use a kitchen thermometer for accuracy, or test with your wrist—it should feel warm but not hot, similar to comfortable bath water. Filtered water produces the best results, as chlorine in tap water can sometimes inhibit yeast activity.
- 1 teaspoon salt: Enhances flavor and controls yeast activity for proper rising. Fine sea salt or kosher salt both work well, with kosher salt adding a purer flavor without the anti-caking agents found in table salt. Salt strengthens the gluten structure while balancing the flavors. Without salt, bread tastes flat and the texture becomes unpleasantly gummy.
- 2½ cups bread flour: Provides structure through its higher protein content. Look for flour labeled specifically as bread flour, which typically contains 12-14% protein compared to all-purpose flour's 10-12%. This higher protein content develops stronger gluten strands for better structure and chew. The flour should feel slightly coarse between your fingers and have a cream color, not bright white (which indicates bleaching).
- 1 cup whole wheat flour: Adds depth of flavor and nutritional benefits. Choose flour labeled "100% whole wheat" to ensure you're getting all the grain's components. Fresh whole wheat flour has a pleasant nutty aroma—if it smells sour or rancid, it's past its prime. This ingredient brings fiber, minerals, and complex flavor that white flour lacks, while the proportion used here ensures the bread remains light rather than dense.
 Pin it
Step-by-Step Instructions
- Step 1: Activate the yeast properly
- Begin by gathering all your ingredients and measuring them accurately—precise measurements are crucial for successful bread making. In a large mixing bowl, preferably one with plenty of room for the dough to expand, combine the instant yeast, granulated sugar, extra virgin olive oil, and warm water. The water temperature is critical—aim for exactly 110°F, using a kitchen thermometer if possible. Too hot (over 120°F) will kill the yeast, while too cool won't activate it properly. Whisk these ingredients together thoroughly, ensuring no dry yeast pockets remain. Allow this mixture to sit undisturbed for 5 minutes. During this time, the yeast will begin consuming the sugar and producing carbon dioxide, creating a slightly foamy surface. This foaming is your visual confirmation that the yeast is alive and active. If you don't see any foam or bubbles after 5 minutes, your yeast may be old or your water temperature was off, and you should start again with fresh yeast.
- Step 2: Prepare the dry ingredients with care
- While the yeast mixture is developing, prepare your dry ingredients. In a separate medium bowl, whisk together the bread flour, whole wheat flour, and salt, ensuring they're evenly distributed. The salt needs to be thoroughly mixed with the flour before adding to the yeast mixture, as direct contact between salt and yeast can inhibit the yeast's activity. Breaking up any clumps in the flour at this stage prevents uneven texture in your final dough. The combination of bread flour and whole wheat creates an ideal balance—the high-protein bread flour provides structure and chewiness, while the whole wheat adds flavor complexity and nutrition. If you notice any unusual specks or debris in your flour, sift it before proceeding.
- Step 3: Combine ingredients to form a cohesive dough
- Once your yeast mixture is foamy and your dry ingredients are well-mixed, it's time to combine them. Add the flour mixture to the yeast mixture all at once. Using a wooden spoon or sturdy silicone spatula, stir the ingredients together with gentle but confident strokes. Start from the center and work outward, incorporating all the flour gradually. Continue mixing until no dry flour remains and a shaggy, somewhat sticky dough forms. Don't worry if it's not perfectly smooth at this point—the kneading process will take care of that. If the dough seems extremely dry and won't come together, you can add an additional tablespoon of warm water. Conversely, if it's too wet and sticking to the sides of the bowl, you can incorporate a tablespoon of additional bread flour. The goal is a dough that holds together but isn't overly sticky.
- Step 4: Master the kneading technique
- Turn the dough out onto a lightly floured work surface—marble, wood, or a clean countertop all work well. Dust your hands lightly with flour to prevent sticking. Begin kneading by pushing the dough away from you with the heel of your hand, then folding it back toward you, rotating a quarter turn, and repeating. This systematic process develops the gluten strands that give bread its structure. Apply firm but gentle pressure—too rough, and you'll tear the developing gluten; too gentle, and the gluten won't develop properly. Continue this rhythmic push-fold-turn motion for 5-7 minutes. As you knead, the dough will transform from rough and shaggy to smooth and elastic. You'll know it's ready when it springs back when lightly pressed with a fingertip and feels smooth and slightly tacky but not sticky. If needed, add additional bread flour one tablespoon at a time during kneading, but do so sparingly—just enough to prevent the dough from sticking to your hands or the work surface. Too much flour will create dense, dry bread.
- Step 5: Allow for a crucial rest period
- After kneading, form the dough into a smooth ball and place it back in the mixing bowl. Cover the bowl with a clean, damp kitchen towel. The dampness creates a humid environment that prevents the surface of the dough from drying out. Position the bowl away from drafts in a warm spot in your kitchen—near a preheating oven works well. Let the dough rest for exactly 10 minutes. This brief rest period, while much shorter than traditional bread recipes, is essential. During this time, the gluten strands relax and reorganize, making the dough more extensible and easier to shape. The yeast also gets a head start on producing carbon dioxide, creating a light texture in the final product. This short rest makes the difference between tough, dense bread and one with a tender crumb.
- Step 6: Shape the dough for your intended use
- After the 10-minute rest, your dough is ready to be shaped according to your needs. For pizza, press and stretch the dough on a floured surface until it reaches your desired thickness and diameter. For a traditional loaf, shape the dough into an oblong form and place it in a greased 9×5-inch loaf pan. For dinner rolls, divide the dough into 12 equal portions (a kitchen scale helps ensure uniformity), shape each into a ball, and arrange in a greased baking dish with slight space between each. For focaccia, press the dough into an oiled sheet pan, then use your fingertips to create characteristic dimples across the surface. For breadsticks, roll portions of dough into ropes of equal length. When shaping, handle the dough firmly enough to work with it but gently enough to preserve the air bubbles developing within. If the dough resists stretching, let it rest for 2-3 minutes, then try again—the gluten will relax and become more pliable.
- Step 7: Bake according to your recipe's specifications
- Once shaped, your dough is ready to bake. Preheat your oven according to your specific bread recipe—typically between 375°F and 425°F for most applications. For pizza, 450°F creates that perfect crispy-chewy crust. For a traditional loaf, 375°F allows even baking throughout. Before baking, you may brush the surface with an egg wash (1 beaten egg mixed with 1 tablespoon water) for a glossy finish, sprinkle with seeds or herbs for flavor, or dust with flour for a rustic appearance. Baking times vary by shape: a pizza crust might take 12-15 minutes, dinner rolls 15-18 minutes, and a full loaf 25-30 minutes. Look for a golden brown color and a hollow sound when tapped on the bottom as indicators of doneness. For accurate results, use an instant-read thermometer—most breads are done when they reach an internal temperature of 190°F to 205°F.
- Step 8: Cool properly before cutting
- Once baked, resist the temptation to immediately slice into your bread. Transfer it from the baking pan to a wire cooling rack, which allows air to circulate and prevents a soggy bottom. Let most bread rest for at least 10-15 minutes before cutting. This cooling period completes the cooking process as residual heat continues to work through the loaf, and allows the structure to set, making slicing cleaner and easier. If you cut bread while too hot, the steam escapes all at once, potentially leaving the interior gummy. The only exception is flatbreads like pizza or focaccia, which are usually best enjoyed while still warm. Use a sharp serrated knife for slicing bread to prevent crushing the tender interior. Store any leftover bread in a paper bag at room temperature for 1-2 days, or wrap tightly and freeze for up to 3 months.
Perfect for Busy Weeknights
The magic of this 20-minute dough recipe lies in how it transforms hectic weeknight dinners from stressful to special. On those evenings when everyone's schedules collide and time seems to evaporate, the ability to create fresh bread becomes a small miracle. I've found that even when the refrigerator seems bare and takeout beckons, a quick batch of this dough can save dinner.
One particularly memorable Wednesday, after a marathon of work meetings and my son's soccer practice, I arrived home with no dinner plan in sight. While the children worked on homework, I mixed this dough and stretched it into a pizza crust. Using leftover roasted vegetables, a bit of cheese, and the last spoonful of pasta sauce, I created a rustic flatbread that my family still talks about. What could have been another forgettable takeout night became a warm family dinner that felt intentional rather than harried.
The psychological boost of serving something homemade cannot be overstated. There's a satisfaction in watching family members reach for another slice of bread that you shaped with your own hands just forty minutes earlier. This recipe has given me back the joy of baking bread on weeknights, something I had previously relegated to weekend projects when time seemed more abundant.
Versatility That Impresses
What continues to delight me about this quick bread dough is its chameleon-like ability to transform into whatever my meal requires. The balanced ratio of ingredients creates a dough that's structurally sound enough for a loaf but tender enough for soft dinner rolls. This versatility has made it an invaluable part of my cooking repertoire.
For casual weekend lunches, I often shape the dough into individual calzones, allowing family members to fill their own with preferred combinations of cheese, vegetables, and meats. The personalized approach turns lunch into an interactive activity rather than just another meal. The dough bakes to a perfect golden brown, encasing the fillings in a chewy pocket that's far superior to anything from the freezer section.
During holiday gatherings, I've impressed guests with garlic knots that begin with this simple dough. After the brief rest period, I roll portions into ropes, tie them into loose knots, and brush with garlic-infused butter before and after baking. These little bites disappear within minutes, and no one believes they began just an hour before serving.
Perhaps my favorite application is using the dough for cinnamon rolls on lazy Sunday mornings. The slight heartiness from the whole wheat flour provides the perfect backdrop for the sweet cinnamon filling, creating a breakfast treat that feels indulgent yet somehow more substantial than versions made with all white flour.
I learned the importance of proper kneading during a memorable kitchen disaster early in my bread-making journey. Rushing through the process one evening, I gave the dough a cursory few folds before declaring it "good enough" and proceeding with shaping pizza crusts. The resulting pizzas featured dough that was simultaneously tough yet underdeveloped, with a strange cracker-like texture in some spots and doughy heaviness in others. My disappointed family gamely ate the toppings while leaving sad crusts on their plates. That night taught me that proper technique can't be rushed, even in a "quick" recipe. Now I set a timer for my kneading process, ensuring I give the dough the full attention it deserves, resulting in consistently excellent texture every time.
 Pin it
Perfect Pairings for Your Homemade Bread
The simple, wholesome flavor of this homemade bread serves as the perfect canvas for countless complementary foods and flavors. Understanding how to pair your bread creations can elevate a simple meal to something truly special, especially when you've put the care into making the bread yourself.
When shaped into a traditional loaf, slices of this bread make exceptional sandwiches that transform everyday fillings into something memorable. The slight nuttiness from the whole wheat flour pairs beautifully with sharp cheeses like aged cheddar or gouda. For a quick but impressive lunch, I often toast slices and top them with avocado, a sprinkle of red pepper flakes, and a drizzle of good olive oil. The contrast between the crisp exterior and tender interior creates the perfect textural background.
For dinner parties, I frequently shape this dough into a rustic flatbread, top it with thin slices of ripe pear, crumbled blue cheese, and a light drizzle of honey, then bake until golden. Cut into small pieces, it makes an appetizer that guests inevitably rave about, never suspecting how quickly it came together. The slight tanginess from the bread balances the sweetness of the pears and honey in a way that store-bought flatbreads simply cannot match.
After years of baking bread, both the traditional long-fermentation varieties and quick versions like this one, I've come to appreciate that they serve different purposes in a home baker's life. This 20-minute dough isn't trying to compete with artisan sourdough that develops flavor over days. Instead, it fills a different but equally valuable role – making fresh, homemade bread accessible on ordinary days when time is limited but the desire for something special remains. The simple pleasure of tearing into warm bread you've made yourself, watching steam escape from its center, and catching that first yeasty aroma – these small moments of satisfaction remain available even on the busiest days, thanks to recipes like this one. And that, perhaps, is its greatest gift to home bakers everywhere.
Frequently Asked Questions
- → Can I use all-purpose flour instead of bread flour?
- Yes, you can substitute all-purpose flour, though the bread won't be quite as chewy. The texture will be slightly softer but still delicious.
- → How long does this dough keep in the refrigerator?
- You can refrigerate this dough for up to 3 days. Place in a covered container with room to expand. Let come to room temperature before shaping and baking.
- → Can I freeze this bread dough?
- Absolutely! After kneading, shape into a ball, wrap tightly in plastic wrap and freeze for up to 3 months. Thaw overnight in the refrigerator before using.
- → What's the best way to tell if my water is the right temperature?
- The water should feel warm but not hot to the touch. If you have a thermometer, aim for 110°F. Too hot will kill the yeast, too cool will slow activation.
- → How long should I bake this dough?
- For a standard loaf, bake at 375°F for 25-30 minutes until golden brown and hollow-sounding when tapped. For rolls, 15-20 minutes. Pizza crust needs 12-15 minutes.