
 Pin it
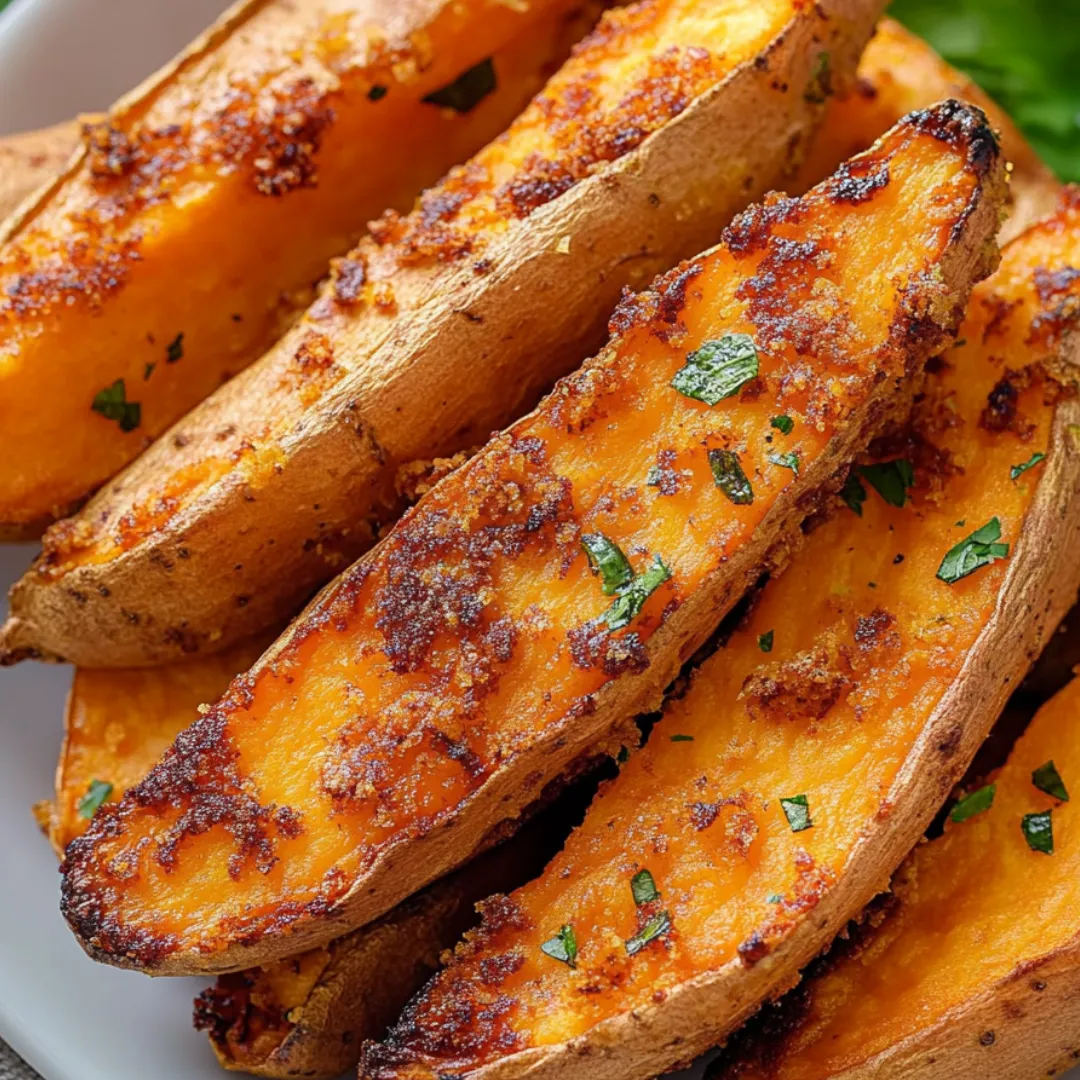
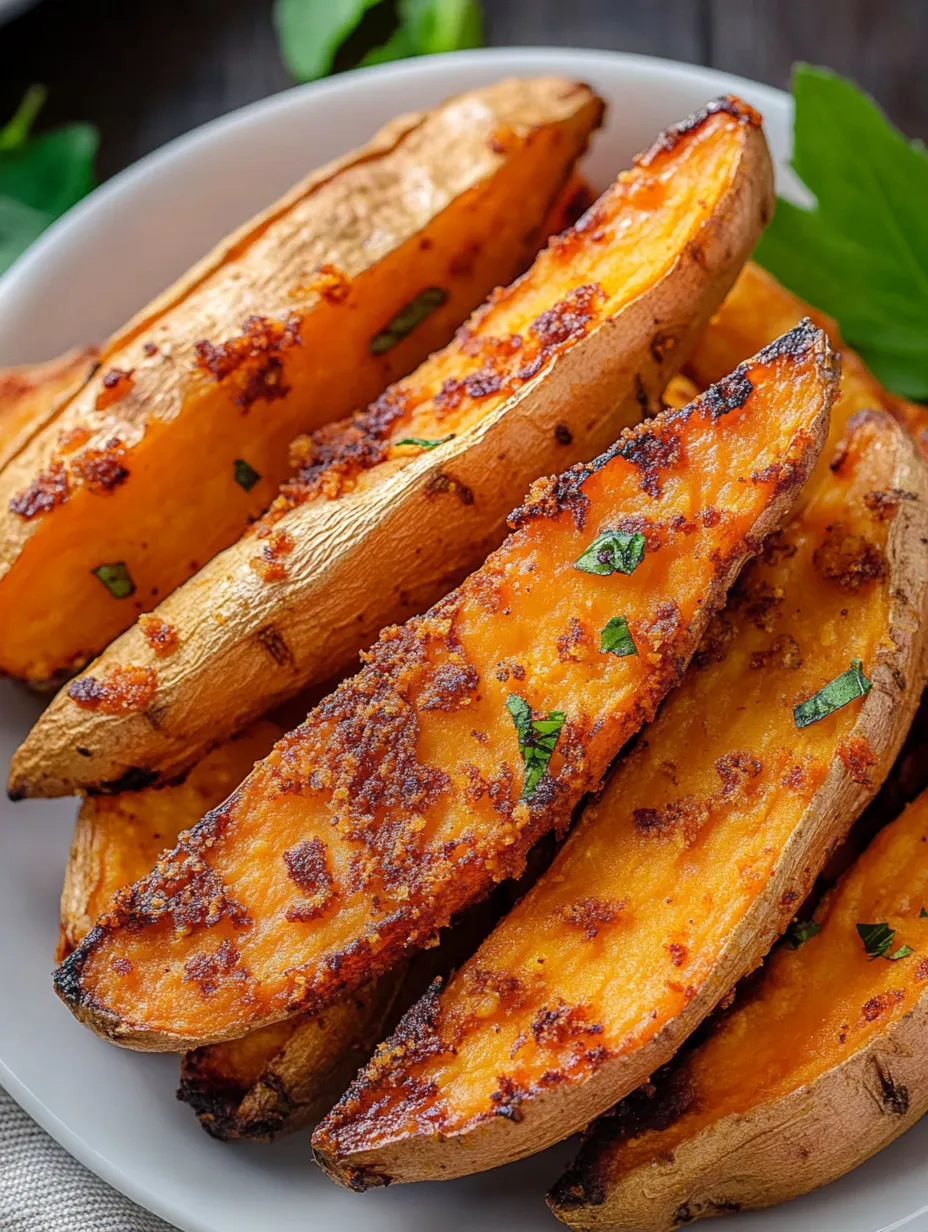
These Extra Crispy Sweet Potato Wedges transform ordinary sweet potatoes into addictively crunchy, perfectly seasoned wedges that satisfy all your comfort food cravings without the guilt. The secret to their exceptional texture lies in the dual cooking method - a longer bake followed by a brief broil - creating wedges with a shatteringly crisp exterior that gives way to a tender, sweet interior. Seasoned with a savory blend of herbs and spices, these wedges develop incredible depth of flavor while baking, making them the perfect companion to burgers, sandwiches, or simply enjoyed on their own with your favorite dipping sauce.
I first made these wedges on a tired weeknight when I needed an easy side dish to accompany burgers. What surprised me most was how a simple baking rack completely transformed their texture! Instead of the soggy sweet potato wedges I'd made in the past, these emerged from the oven with an astonishing crunch that my husband compared to deep-fried versions at our favorite restaurant. Now they're on regular rotation in our house, and I've even caught family members snacking on the cold leftovers straight from the refrigerator – they're that good!
Ingredients You'll Need
- 2 Large Sweet Potatoes: Look for firm, unwrinkled sweet potatoes of similar size for even cooking
- 3 Tablespoons Olive Oil: Helps create that crispy exterior; use a good quality oil for better flavor
- 1 Teaspoon Salt: Enhances all the flavors; kosher salt works beautifully here
- 3/4 Teaspoon Garlic Powder: Adds savory depth without the risk of burning that comes with fresh garlic
- 1/2 Teaspoon Sugar: Helps with caramelization and amplifies the natural sweetness
- 1/2 Tablespoon Italian Seasoning: Provides a blend of herbs that complements the sweet potatoes perfectly
- 1/2 Teaspoon Black Pepper: Adds a gentle heat that balances the sweetness
 Pin it
Step-by-Step Cooking Instructions
- Prepare Your Baking Surface:
- Begin by preheating your oven to 450°F (232°C), creating the high heat environment necessary for achieving that coveted crispy exterior. Line a large baking sheet with aluminum foil, shiny side up – this reflects heat and helps with even cooking. Place an oven-safe baking rack on top of the foil-lined baking sheet. This crucial elevation allows hot air to circulate completely around the wedges, eliminating the soggy bottoms that often plague oven-baked fries. The rack is the secret weapon that transforms these from ordinary roasted sweet potatoes into crispy wedges that rival their deep-fried counterparts.
- Cut Perfect Wedges:
- Wash your sweet potatoes thoroughly under cool running water, scrubbing lightly to remove any dirt. Decide whether to peel them (for a more uniform texture) or leave the skin on (for added nutrition and rustic appearance). Cut off the pointy ends, then slice each potato in half lengthwise to create a stable base. Place the flat side down on your cutting board and cut each half into 4-6 wedges, depending on the size of your potatoes. For the crispiest results, try to keep all wedges approximately the same size – about 1/2 to 3/4 inch thick at the widest part. Uniform thickness ensures they'll cook at the same rate, preventing some pieces from burning while others remain undercooked.
- Season Generously:
- Transfer your sweet potato wedges to a large mixing bowl, which provides ample space for tossing without crowding. Drizzle the olive oil over the wedges, then sprinkle with salt, garlic powder, sugar, Italian seasoning, and black pepper. Using your hands or a large spoon, toss the wedges thoroughly until each piece is evenly coated with oil and seasonings. This coating not only adds flavor but creates the base for your crispy exterior. Don't rush this step – proper seasoning distribution makes the difference between bland and brilliant wedges. If the wedges seem dry, you can add an additional tablespoon of oil, but avoid over-oiling, which can make them soggy.
- Arrange for Maximum Crispiness:
- Carefully arrange the seasoned sweet potato wedges on the prepared baking rack in a single layer, ensuring they don't touch one another. This crucial spacing allows hot air to circulate around each wedge, creating that coveted crispy exterior on all sides. If the wedges are too crowded, they'll steam rather than roast, resulting in a softer texture. Position the wedges with a cut side down for stability. If you have too many wedges to fit in a single layer, it's better to use a second baking sheet rather than crowding them – patience here pays off with superior crispiness.
- Bake and Broil for Perfect Texture:
- Place the baking sheet in the preheated oven and bake for 30 minutes. During this time, the high heat begins to caramelize the natural sugars in the sweet potatoes while the seasonings infuse into the flesh. After 30 minutes, without removing the wedges from the oven, switch your oven setting to broil. Let the wedges broil for an additional 3-5 minutes until they develop a deep golden brown color with crispy edges. Watch them closely during this broiling stage – the difference between perfectly caramelized and burnt can happen in seconds. This final blast of intense heat is what transforms good sweet potato wedges into irresistibly crispy ones.
- Rest Before Serving:
- Once your wedges have reached crispy, golden perfection, remove the baking sheet from the oven and allow the wedges to rest on the rack for about 5 minutes. This brief resting period allows the exteriors to become even crispier as they cool slightly while the interiors remain hot and tender. The contrast between the crisp exterior and fluffy interior becomes more pronounced during this rest. As they cool, the wedges also become sturdy enough to hold their shape when dipped, making them perfect for serving with your favorite sauce.
- Serve with Flair:
- Transfer your wedges to a serving platter while still hot and consider adding an extra sprinkle of salt or herbs for a fresh flavor boost. For an elevated presentation, try tossing the hot wedges with a tablespoon of freshly grated Parmesan cheese and some chopped fresh herbs like basil, parsley, or chives – the residual heat will slightly melt the cheese, creating a delicious flavor boost. Serve immediately alongside your main dish or with dipping sauces like sriracha mayo, garlic aioli, or classic ketchup for a versatile side that complements nearly any meal.
I learned about the power of the baking rack technique completely by accident. During one cooking session, my baking sheets were all in use, so I improvised by placing a cooling rack over a foil-lined sheet. The sweet potato wedges that emerged were shockingly crispy – unlike any I'd made before! Now I refuse to make them any other way. When my sister complained about her soggy sweet potato fries, I shared this simple rack trick, and she called me the next day, amazed at how perfectly her wedges turned out. Sometimes the best cooking discoveries come from necessary improvisation!
Perfect Pairings
These versatile sweet potato wedges complement a wide range of main dishes. They're exceptional alongside burgers, adding a sweet counterpoint to savory beef. For a complete meal, serve them with grilled chicken sandwiches and a simple green salad. They also make an excellent base for loaded wedges – try topping them with black beans, avocado, and a drizzle of lime crema for a vegetarian main dish. For a party-worthy appetizer, arrange them on a platter with three dipping sauces: chipotle mayo, honey mustard, and avocado ranch.
Make-Ahead Tips
While these wedges are best enjoyed fresh from the oven, you can prep them ahead to streamline mealtime. Cut and season the sweet potatoes up to 24 hours in advance, storing them in an airtight container in the refrigerator. When ready to cook, arrange on the rack and bake as directed, adding 3-5 minutes to the baking time since they'll be starting cold. Already-baked wedges can be reheated in a 400°F oven for 5-7 minutes to restore their crispiness, though they won't be quite as perfect as freshly made ones.
Creative Variations
Once you've mastered the basic recipe, try these delicious variations: For sweet and spicy wedges, add 1/4 teaspoon cayenne pepper and 1 tablespoon brown sugar to the seasoning mix. Create Mediterranean-inspired wedges by replacing the Italian seasoning with 1 teaspoon each of dried oregano and rosemary, then finishing with crumbled feta cheese. For a curry version, substitute the Italian seasoning with 1 tablespoon curry powder and serve with a cooling yogurt dip. Taco-seasoned wedges make a fun alternative – use 1 tablespoon taco seasoning instead of Italian herbs.
 Pin it
Troubleshooting Tips
If your wedges aren't crisping properly, your oven temperature might be off – consider using an oven thermometer to verify it's reaching 450°F. For extra-large sweet potatoes, increase the baking time by 5-10 minutes before broiling. If your wedges are browning too quickly but still aren't tender inside, lower the oven temperature to 425°F and extend the baking time by 5-10 minutes. Soggy wedges usually result from overcrowding the pan or not using a rack – always maintain space between pieces and elevate them for optimal air circulation.
I discovered a game-changing finishing touch for these wedges completely by accident. While they were cooling one evening, I had some fresh basil I'd just picked from the garden and a bit of leftover grated Parmesan cheese from making pasta the night before. On a whim, I tossed these with the hot wedges, and the combination was absolutely magical! The heat from the wedges slightly wilted the basil, releasing its aromatic oils, while partially melting the cheese to create little pockets of savory goodness clinging to the crispy exteriors. Now this isn't just a side dish – it's often the star of the meal that everyone reaches for first!
Frequently Asked Questions
- → Why aren't my sweet potato wedges getting crispy?
- Make sure not to overcrowd the baking sheet - wedges need space between them. Also, the final broil step is crucial for achieving that extra crispy exterior.
- → Do I need to use a baking rack?
- The baking rack helps air circulate around the wedges for maximum crispiness. Without it, you'll need to flip the wedges halfway through baking.
- → Can I use different seasonings?
- Absolutely! Try cajun seasoning, taco seasoning, or simply salt and pepper. You can also add a pinch of cayenne for heat or cinnamon for sweetness.
- → How do I store and reheat leftovers?
- Store in an airtight container in the refrigerator for up to 3 days. Reheat in a 400°F oven for 5-10 minutes to restore crispiness. Microwave reheating will make them soft.
- → Can I make these without oil?
- The oil helps achieve crispiness, but you can reduce it to 1-2 tablespoons. For oil-free, try using a little aquafaba (chickpea liquid) instead, though they won't get quite as crispy.