
 Pin it
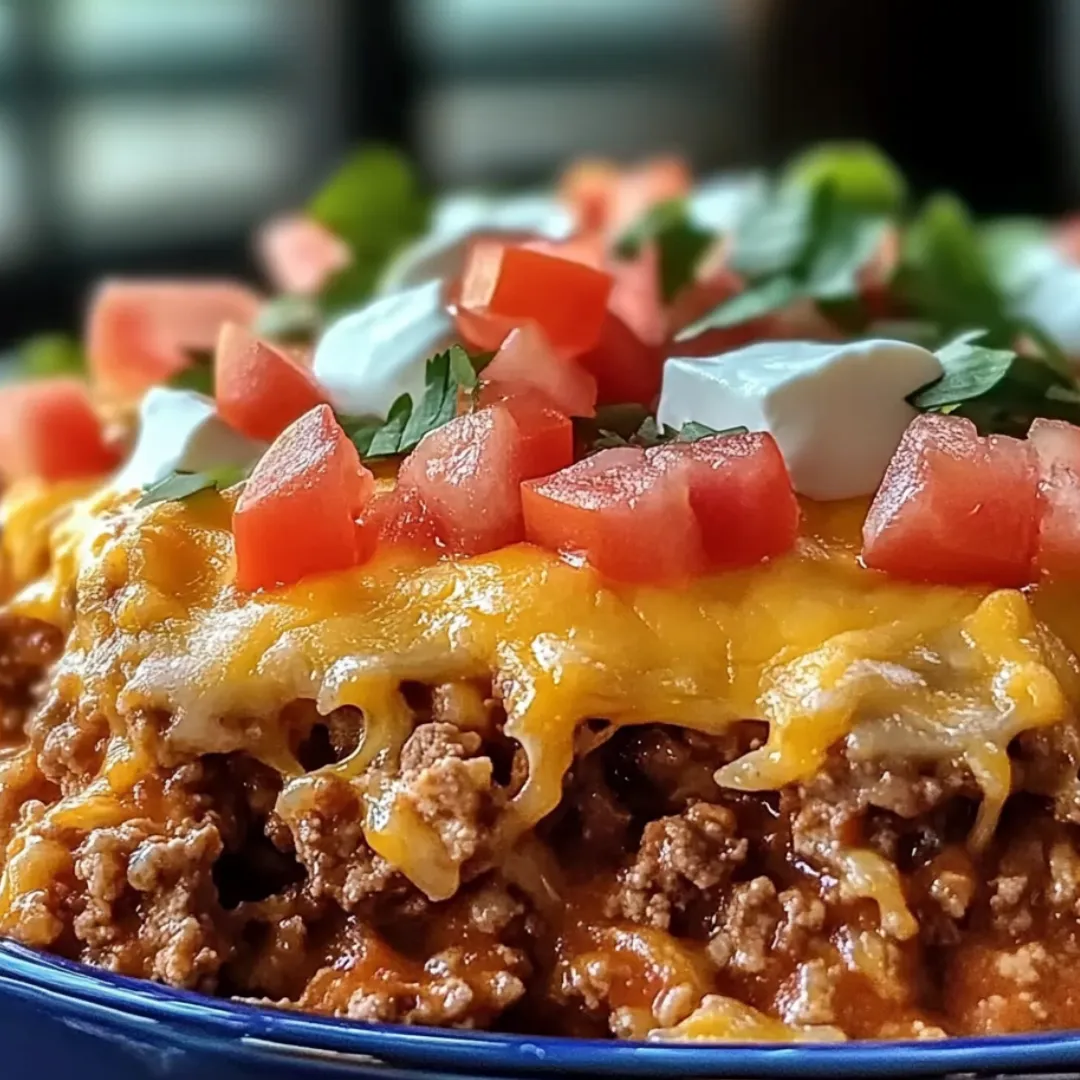
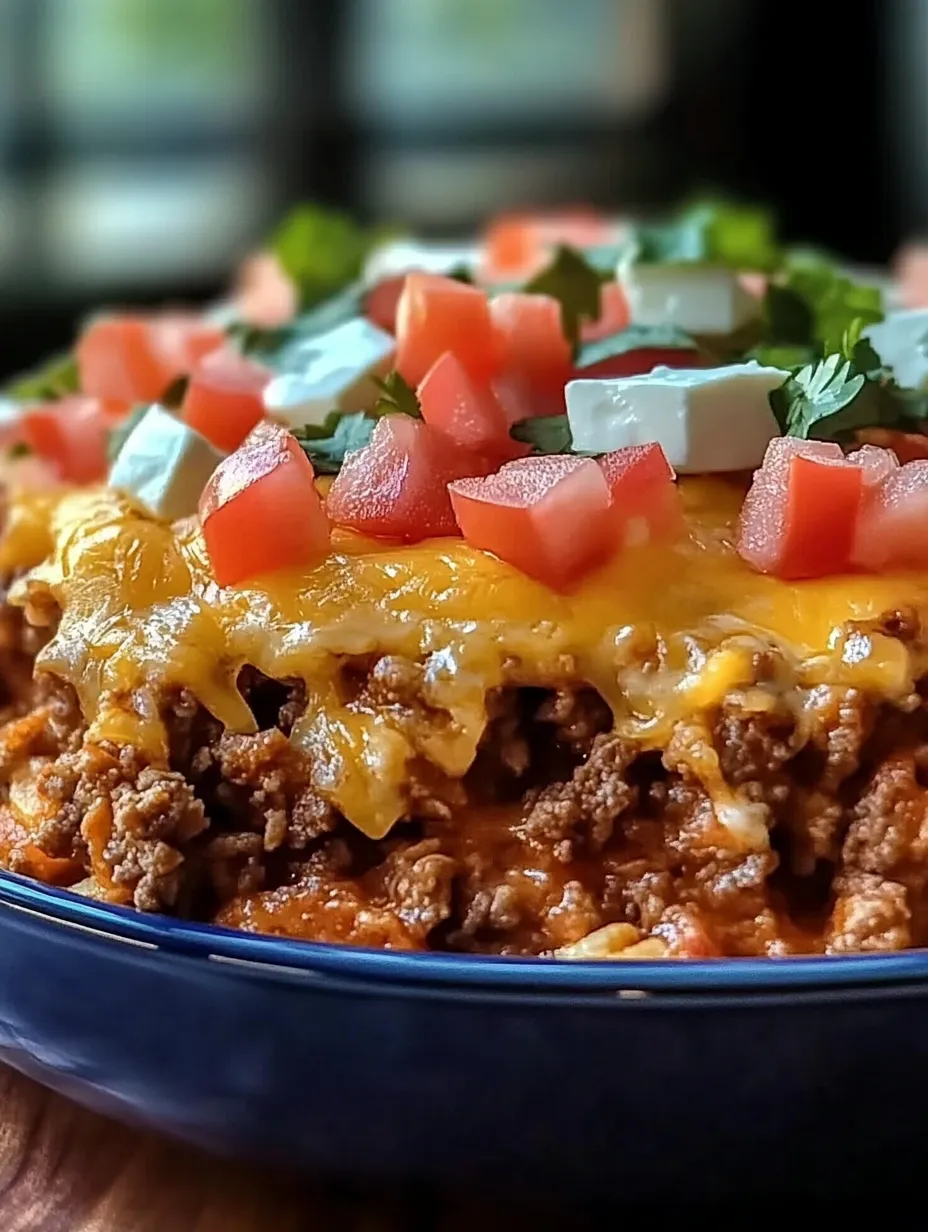
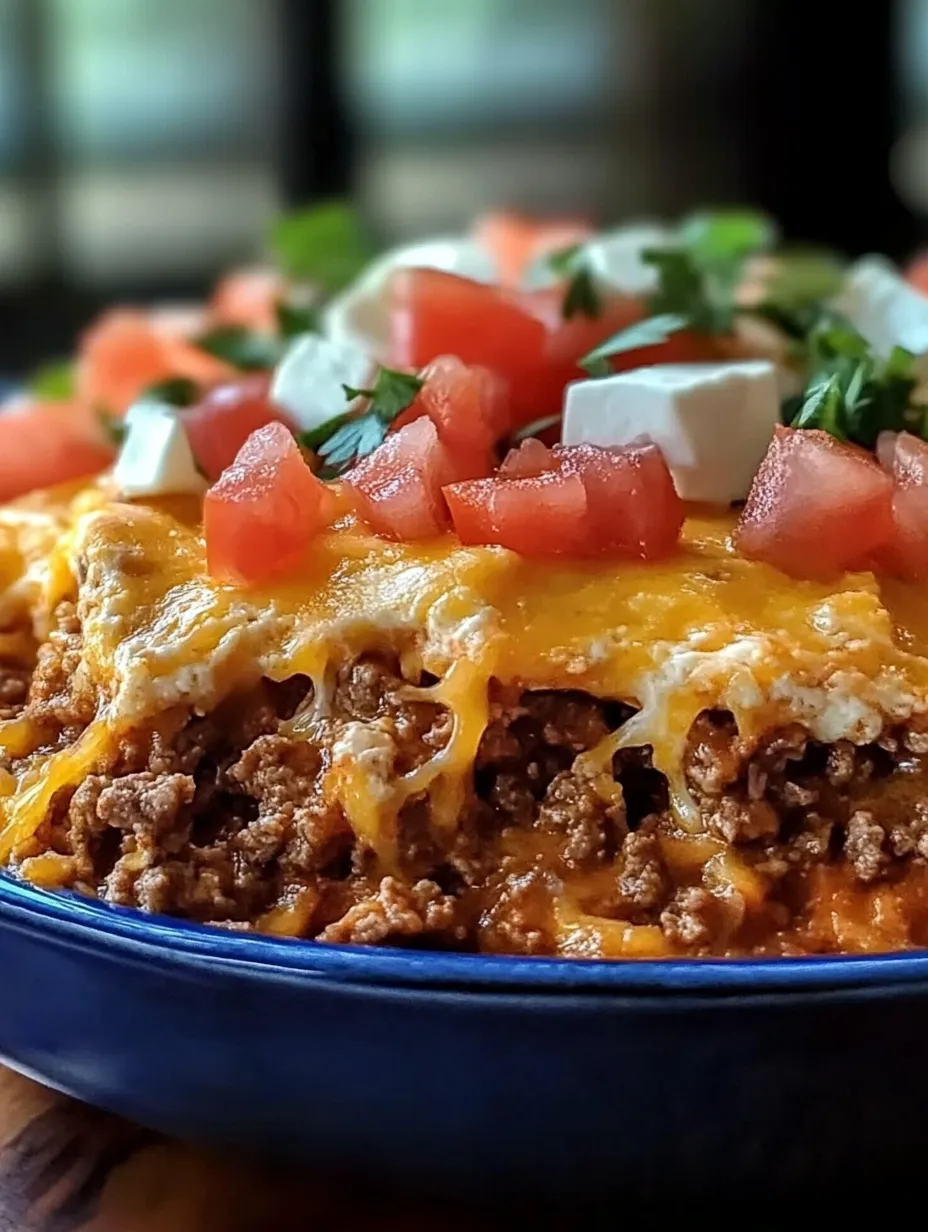
This hearty Loaded Taco Beef Casserole transforms simple ingredients into a crowd-pleasing meal that brings together the bold flavors of Mexican cuisine with comforting casserole goodness. The layers of seasoned ground beef, beans, corn, and melty cheese create a mouthwatering dish that satisfies even the pickiest eaters. I discovered this recipe during a family gathering and immediately knew it would become a staple in my home cooking rotation.
I first made this casserole when hosting my sister's family, including her three children who rarely agree on anything food-related. To my surprise, all three kids asked for seconds, and my brother-in-law requested the recipe before leaving. Since then, it's become my go-to dish whenever I need something guaranteed to please a crowd.
Ingredients
- 1 pound lean ground beef: The foundation of this dish, providing hearty protein. Look for 90/10 or 85/15 lean-to-fat ratio for the best flavor without excessive grease. The meat should have a bright red color with minimal white fat visible.
- 1 packet taco seasoning mix (1 ounce): Adds authentic Mexican flavors without having to measure multiple spices. Choose low-sodium varieties if you're watching salt intake, or make your own blend with cumin, chili powder, garlic powder, and oregano.
- 1 cup salsa: Contributes moisture and complex flavor to the meat mixture. Select a salsa that matches your heat preference - mild, medium, or hot all work beautifully. Chunky varieties add nice texture to the finished dish.
- 1 can black beans (15 oz), drained and rinsed: Provides fiber, protein, and a delightful texture contrast. Look for beans that are firm and intact, not mushy. Always rinse thoroughly to remove excess sodium.
- 1 cup frozen corn kernels: Adds sweet pops of flavor and vibrant color. No need to thaw before using - the frozen corn maintains its shape better during baking. In summer, fresh corn cut from the cob makes an amazing substitute.
- 2 cups crushed tortilla chips, divided: Creates both a foundation layer and crispy topping. Choose sturdy, thick tortilla chips that won't become soggy too quickly. I prefer yellow corn chips for their rustic flavor and golden color.
- 2 cups shredded cheddar cheese, divided: Binds everything together with melty goodness. Freshly grated cheese melts much better than pre-shredded varieties, which contain anti-caking agents. A sharp cheddar provides the most flavor impact.
- 1/2 cup sliced black olives: Adds briny contrast and visual appeal. Look for firm, plump olives without dents or discoloration.
- 1/4 cup chopped green onions: Contributes fresh, mild onion flavor and bright color. Select bunches with crisp green tops and firm white bases.
- 1/4 cup fresh cilantro, chopped (optional): Brings a fresh, citrusy note that balances the rich flavors. Choose bunches with vibrant green leaves without yellowing or wilting.
 Pin it
Step-by-Step Instructions
- Step 1: Prepare your oven and baking dish
- Begin by preheating your oven to 350°F to ensure it reaches the proper temperature before baking. This temperature is perfect for melting cheese without burning the tortilla chips. While the oven heats, take a 9×13 baking dish and lightly coat it with cooking spray or a thin layer of oil. This prevents sticking and makes cleanup much easier later.
- Step 2: Brown the ground beef properly
- Heat a large skillet over medium heat until you can feel warmth rising from the surface when you hold your hand about an inch above it. Add the ground beef, breaking it into small pieces with a wooden spoon or spatula. Cook for 5-7 minutes, continuing to break up chunks as it browns. You want an even, crumbly texture throughout. Look for the meat to turn completely from pink to brown before moving to the next step. Carefully tilt the pan and spoon off excess fat, or use a paper towel to absorb it.
- Step 3: Create the flavor base
- Add the full packet of taco seasoning directly to the hot meat, stirring to coat each piece evenly. The heat activates the spices, releasing their aromatic oils for maximum flavor. Pour in the cup of salsa, stirring to combine completely. Reduce the heat to medium-low and allow the mixture to simmer gently for 2-3 minutes. You'll notice it thickening slightly as the meat absorbs the seasonings. This step is crucial for developing that authentic taco flavor throughout the beef.
- Step 4: Combine the main ingredients
- Transfer the seasoned beef mixture to a large mixing bowl. Add the drained and rinsed black beans, making sure no liquid remains on them. Stir in the frozen corn kernels - no need to thaw them first, as they'll cook perfectly in the oven. Gently fold these ingredients together until evenly distributed, being careful not to mash the beans.
- Step 5: Begin layering your casserole
- Spread 1 cup of crushed tortilla chips in an even layer across the bottom of your prepared baking dish. The chips should cover the entire bottom but don't press them down too firmly. This layer provides a crunchy foundation and helps absorb excess moisture. Next, carefully spoon the beef mixture over the chips, spreading it into an even layer that reaches all corners of the dish.
- Step 6: Add the first cheese layer
- Evenly sprinkle 1 cup of the shredded cheddar cheese over the beef mixture. The cheese will melt down into the meat, beans, and corn, binding them together and adding rich flavor. Make sure to distribute it evenly for consistent cheesy goodness in every bite.
- Step 7: Create the crunchy topping
- Gently scatter the remaining 1 cup of crushed tortilla chips over the cheese layer. Use the back of a spoon to lightly press them into the cheese - just enough to help them adhere without crushing them completely. This ensures they'll stay in place but still provide that satisfying crunch.
- Step 8: Finish with more cheese
- Top everything with the remaining 1 cup of shredded cheddar cheese, making sure to cover the entire surface. This final cheese layer will create a beautiful golden crust as it melts and browns in the oven, sealing in all the delicious flavors beneath.
- Step 9: Bake to perfection
- Place the assembled casserole on the middle rack of your preheated oven. Bake for 20-25 minutes, or until you see bubbling around the edges and the cheese has melted completely with light golden spots appearing on top. The internal temperature should reach at least 165°F to ensure everything is properly heated through.
- Step 10: Add fresh toppings
- Remove the casserole from the oven and immediately sprinkle the sliced black olives evenly across the top. They'll warm slightly from the residual heat without losing their texture. Follow with the chopped green onions in an even layer, and if using, scatter the fresh cilantro across the top. These fresh ingredients provide bright flavor, color contrast, and textural interest to the hot casserole.
- Step 11: Rest before serving
- Allow the casserole to rest for at least 5 minutes before cutting into it. This crucial step lets the layers settle and firm up slightly, making it much easier to serve neat portions. The internal heat will continue to meld the flavors together during this time.
The aroma filling your kitchen right now will have everyone gathering around the table in anticipation of this incredible meal!
The Perfect Family Meal Solution
Creating meals that satisfy everyone in the household can feel like an impossible challenge some nights. This Loaded Taco Beef Casserole has repeatedly saved my sanity during busy weeks when time is short but appetites are big. The combination of familiar taco flavors transformed into an easy-to-serve casserole format makes dinnertime stress-free.
What I particularly love about this recipe is its ability to stretch a pound of ground beef into a substantial meal. The beans provide extra protein while the corn adds a vegetable component without complaints from picky eaters. Even my husband, who typically reaches for seconds of meat-heavy dishes, finds this casserole completely satisfying.
When life gets especially hectic, I often prepare this casserole through step 8 in the morning, cover it tightly, and refrigerate it. Then at dinner time, I simply add about 5-7 minutes to the baking time to account for the chilled ingredients. This make-ahead flexibility has been invaluable on days packed with activities and commitments.
Versatile Serving Options
One of the joys of this recipe is its versatility when it comes to serving. While delicious on its own, this casserole plays well with numerous side dishes and toppings that can transform it from a quick weeknight meal to something special enough for weekend gatherings.
For a simple family dinner, I often serve scoops of this casserole with a crisp green salad dressed with lime vinaigrette. The fresh, acidic notes of the salad perfectly complement the rich, spicy casserole. My children prefer theirs with additional toppings like diced avocado, sour cream, or extra cheese – essentially treating each serving like a taco bowl.
When hosting friends, I've created a "taco bar" effect by setting out the hot casserole alongside bowls of various toppings: diced tomatoes, shredded lettuce, jalapeños, several hot sauces, and lime wedges. This interactive approach always generates conversation and allows guests to customize their portions.
For potluck gatherings, this casserole has earned me countless recipe requests. It maintains its temperature well, travels without spilling, and stays delicious even after sitting on a buffet table for an hour. The fact that it can be easily doubled for larger crowds makes it my go-to contribution for community events.
During a summer vacation at my cousin's lake house, I discovered the magic of adding a layer of creamy refried beans before the meat mixture. The additional richness transformed the casserole into something even more special. My family now requests "Aunt Maria's lake house casserole" whenever we gather for casual celebrations. The way food creates these lasting memories is what makes cooking such a joy for me.
 Pin it
Brilliant Variations
This casserole's flexibility is part of what makes it such a reliable standby in my cooking rotation. Over the years, I've created numerous variations that keep the basic format fresh and exciting. During garden harvest season, I frequently add diced zucchini and bell peppers to the beef mixture, increasing the vegetable content while adding gorgeous color and texture.
For guests who prefer chicken, I've successfully substituted 2 cups of shredded rotisserie chicken mixed with the taco seasoning and salsa. The result is equally delicious with a lighter profile that pairs beautifully with summer sides. The chicken version has become particularly popular for casual luncheons with my girlfriends.
When cooking for those who enjoy more heat, I incorporate a finely chopped jalapeño or two into the meat mixture and use pepper jack cheese instead of cheddar. This spicy version, served with cooling avocado crema on the side, creates a wonderful contrast of temperatures and flavors that heat-lovers appreciate.
Around the holidays, when everyone craves comfort food but I'm short on time, I prepare a double batch and freeze half before baking. The frozen casserole thaws beautifully overnight in the refrigerator and bakes up just as deliciously as a fresh version – a discovery that has saved countless hectic December evenings.
After years of making this casserole for everything from Tuesday night dinners to neighborhood gatherings, I'm still amazed at how something so simple can consistently deliver such satisfaction. The way the spices permeate throughout, how the cheese creates those perfect crispy edges, and the balance of textures make this dish special despite its humble ingredients. I've watched children who "don't eat casseroles" clean their plates and adults who claim to be "watching carbs" return for seconds. That's the ultimate testament to a truly great recipe – it simply makes people happy.
Frequently Asked Questions
- → Can I make this casserole ahead of time?
- Yes! Prepare everything up to the baking step, cover and refrigerate. Add 5-10 minutes to the baking time when cooking from cold.
- → What can I serve with this taco casserole?
- A simple green salad, Mexican rice, or some sliced avocado make perfect sides for this dish.
- → Can I substitute ground turkey for the beef?
- Absolutely! Ground turkey or chicken works great as a lighter alternative to beef in this recipe.
- → How spicy is this casserole?
- It's mild-to-medium spicy depending on your salsa. For less heat, use mild salsa; for more kick, choose hot salsa or add diced jalapeños.
- → Can I freeze leftovers?
- Yes, this freezes well. Portion into containers and freeze for up to 3 months. Thaw overnight and reheat until hot throughout.